Let me show you something that changes the way you watch a suspicious video.
Imagine you’re watching a politician speak. The face looks right. The voice sounds right. The expressions feel natural. If you only look at the face, you might never suspect anything.
But now pause the video.
Look at the picture frame behind them. Look at the edge of their hair. Watch the shadow on the wall. Then play the same few seconds again and pay attention to whether those details stay physically consistent from frame to frame.
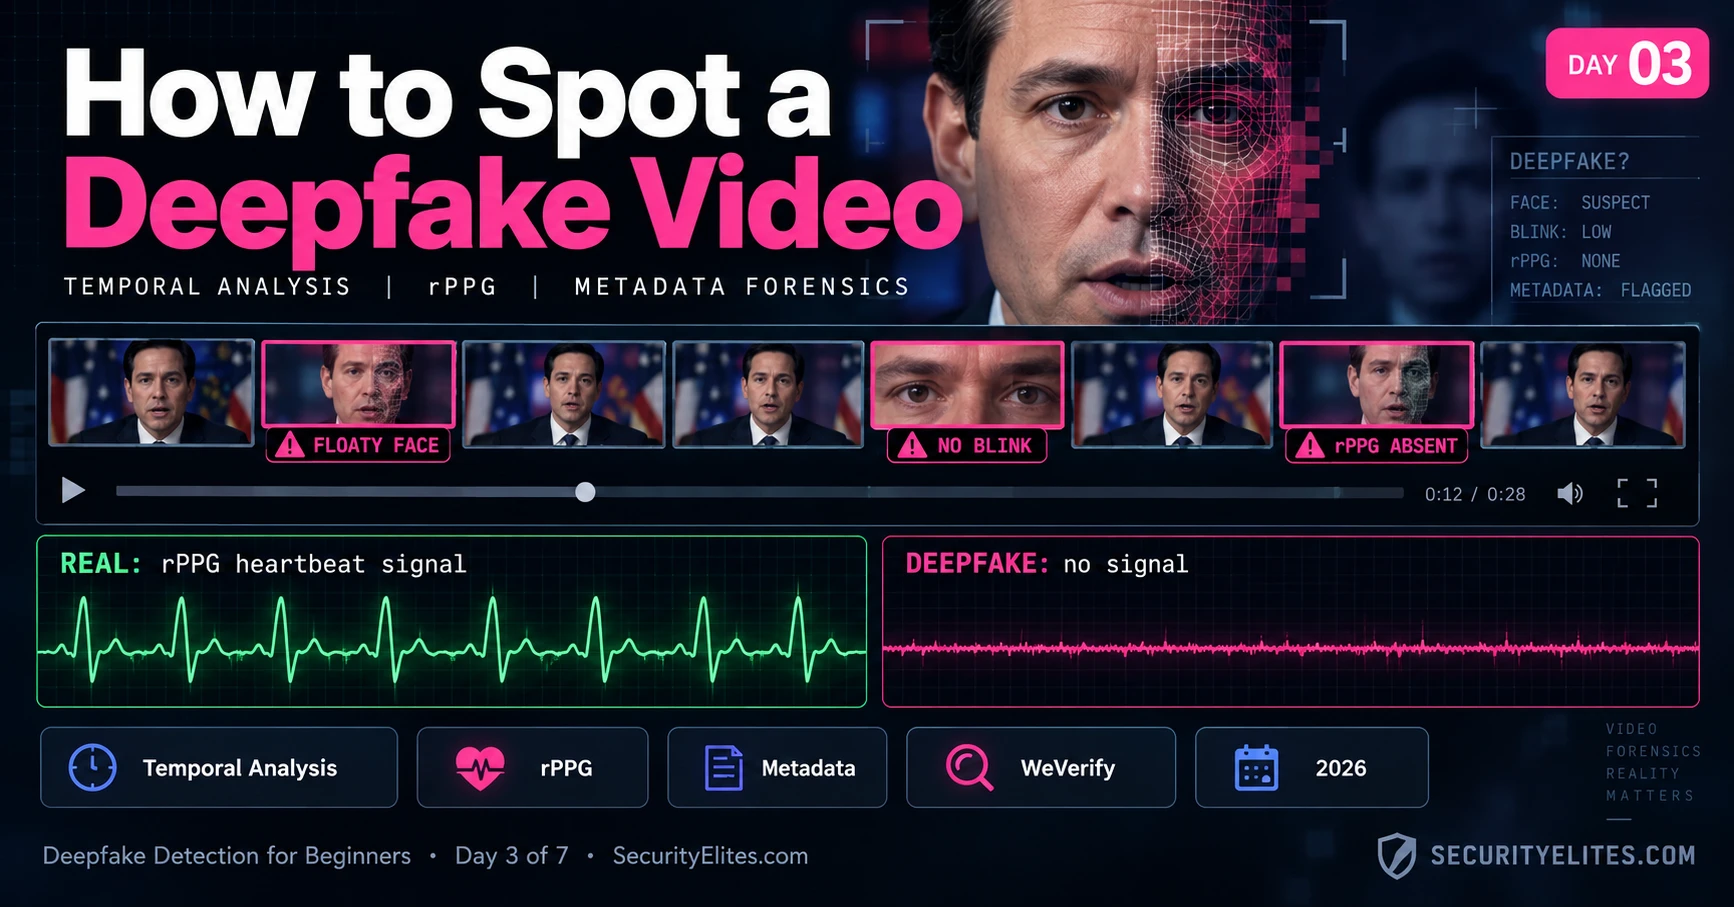
This is where how to spot a deepfake video becomes different from spotting an AI-generated image. An image only has to convince you in one frame. A video has to keep convincing you over and over again — often 25 or 30 frames every second. The face has to move naturally. Lighting has to remain consistent. Shadows have to behave correctly. Background objects shouldn’t subtly change shape. And, importantly, the physiological signals coming from a real human face should make sense over time.
That gives us a powerful advantage: time itself becomes evidence.
Today, I’m going to teach you how to use that evidence. We’ll go through the visual clues I personally look for when examining suspicious footage, including temporal inconsistencies, unnatural blinking, facial-boundary artifacts, lighting changes, and the surprisingly useful rPPG signal — the tiny color changes in skin caused by blood flowing through the face.
Then we’ll move from human observation to actual forensic tooling. I’ll walk you through InVID and WeVerify, two browser-based tools that can help you extract keyframes, investigate the video’s source, and verify whether what you’re watching is authentic.
You don’t need to be a video-forensics expert for this. I want you to finish today’s lesson with a simple habit: don’t just watch the face — watch what happens between the frames.
Because that’s often where the deepfake gives itself away.
🎯 What You’ll Master in Day 3
⏱ 25 min read · 3 exercises · Browser + free tool needed
- Day 1 complete: What Are Deepfakes? — you need the AI creation pipeline before video artifacts make sense
- Day 2 complete: How to Spot AI Generated Faces — the visual checklist becomes one input into today’s video analysis
- Chrome or Firefox — needed for the WeVerify browser extension you’ll install in Exercise 1
How to Spot Deepfake Video — Day 3 of 7
- Why Video Is Harder — The Temporal Dimension Problem
- The Floaty Face — Temporal Inconsistency Between Frames
- rPPG — The Heartbeat Deepfakes Can’t Fake (Yet)
- Blinking Patterns and the 3D Headpose Problem
- Metadata Forensics — What the File Itself Reveals
- Compression Artifacts at Edit Boundaries
- The Free Video Verification Workflow
- Questions and Answers
If you’re coming from yesterday’s image detection lesson, there’s one thing I want you to change immediately: don’t try to detect a deepfake video one frame at a time. Modern deepfake models can generate individual frames that look perfectly convincing and can pass the 8-point checklist we used on Day 2.
Instead, I want you to start thinking about time as evidence. Watch what changes between frames. Watch what stays suspiciously consistent. Look for tiny movements in the face, hair, lighting, shadows, and background that don’t quite behave the way real video should. Then look at the file itself — because video metadata can sometimes tell you something the pixels can’t: where the file came from, how it was processed, and whether its history makes sense.
The mindset is very similar to email header forensics. You aren’t simply asking, “Does this look real?” You’re asking, “What evidence can I find that tells me where this actually came from?” If you’ve never worked with email headers, I usually point beginners to the Email Header Analyzer first. The pattern-recognition you build there transfers surprisingly well to video metadata analysis.
We’ll put all of today’s techniques together inside the AI Deepfake Hub, and I’ll also connect what we’re learning to my How to Spot AI Deepfakes 2026 reference guide. If you’re following the wider AI security track, you’ll see how this fits into the LLM Hacking Hub as well.
Why Video Is Harder — The Temporal Dimension Problem
I learned this the hard way: when I’m checking a suspicious video, I don’t rely on a single frame anymore. I used to do exactly that. I’d pause the video, zoom in on the face, inspect the eyes and mouth, check the skin, and try to decide whether the frame looked AI-generated.
That approach made sense a few years ago. It doesn’t work nearly as well against the quality of deepfakes we’re dealing with now.
Here’s why. A video isn’t just a collection of independent images. At 25 frames per second, every second gives you roughly 25 separate frames — and those frames also have to make sense as one continuous sequence. The face has to move naturally from one frame to the next. Hair shouldn’t suddenly change shape. Lighting shouldn’t jump. Shadows shouldn’t shift without a reason. Background objects shouldn’t subtly warp and then return to their original shape.
Modern deepfake systems are extremely good at making individual frames look convincing. So if I grab one frame from a good 2026 deepfake and apply the image checklist from Day 2, I may find nothing obviously wrong. The interesting evidence often appears when I stop asking, “Does this frame look real?” and start asking, “Does this sequence behave like real video?”
That’s the temporal dimension — and it’s one of the most useful ideas I want you to take away from today’s lesson.
In fact, longer footage can give us an advantage. Every additional second gives us more frames to compare and therefore more opportunities for a small inconsistency to appear. A ten-second clip may give you very little evidence. A five-minute recording gives you thousands of frames to examine. A live video call can be even more challenging for an attacker because the synthetic face has to keep responding naturally as the person turns their head, changes expression, moves around, or reacts to unexpected requests.
Think about what happens if you ask someone on a suspicious video call to turn their head slowly to the left and then back to the camera. You’re not just testing whether their face looks realistic. You’re putting the entire generation pipeline under stress: facial geometry, lighting, skin texture, hair, ears, background boundaries, and the transition between frames all have to remain coherent.
And this is where I want to correct one common misconception: the Day 2 image checklist is not useless for video. I still use it. It can catch obvious problems in individual frames. But I treat it as the first layer, not the final verdict.
My video workflow is therefore layered: frame-level inspection first, temporal analysis next, and metadata forensics after that. Each layer answers a different question. The frame tells me what one moment looks like. Temporal analysis tells me whether those moments behave like a continuous physical event. Metadata can give me additional clues about the file’s history and provenance.
That’s the mindset I want you to build today. Don’t watch a suspicious video once and ask yourself whether the person “looks fake.” Slow it down. Compare frames. Look for what changes, what doesn’t change, and what shouldn’t be changing at all.
Once you start watching video this way, you’re no longer relying entirely on your eyes. You’re treating the video as evidence.
The Floaty Face — Temporal Inconsistency Between Frames
The first thing I look for when someone sends me a suspicious video is what I call the floaty face. If you’ve never seen it before, it sounds almost too subtle to matter. Once you know what you’re looking for, though, it becomes surprisingly easy to spot.
Think back to the ear test from Day 2. There, I was looking for something that shouldn’t change between still images. Here, I’m looking for something slightly different: does the face move naturally with the head?
Here’s the basic reason this can happen. In many face-swap systems, the software first tracks facial landmarks in the source video, generates or warps the replacement face, and then blends that face into the original frame. That process has to be repeated continuously as the person’s head moves.
And that’s where things can go wrong.
When the subject suddenly turns their head, nods, or makes a quick movement, the synthetic face may not track perfectly from one frame to the next. You can sometimes see a tiny wobble around the cheeks or jaw, an unnatural movement around the hairline, or a moment where the face seems to slide slightly relative to the surrounding head.
That’s the floaty face.
Let me show you how I test for it. I don’t start by staring at the face at normal playback speed. First, I watch the entire clip once so I know where the fast movements occur. Then I go back to those moments — particularly a quick head turn, a sharp nod, or a sudden change in expression.
Now pause.
Scrub backward and forward through those few frames. If your video player allows frame-by-frame navigation, use it. On many HTML5 players, the arrow keys can move through the timeline, although the exact behaviour depends on the player and browser. You can also slow the playback speed if frame stepping isn’t available.
What am I looking for?
I’m watching the relationship between the face and everything around it. Does the jaw move naturally with the neck? Does the hairline remain attached to the head? Do the cheeks and ears follow the same motion? Does the boundary between the synthetic face and the original head remain stable?
If the face appears to drift, wobble, stretch, or momentarily separate from the surrounding geometry during movement, that’s a useful warning sign.
One important qualification: a strange-looking frame is not automatically proof of a deepfake. Video compression, motion blur, dropped frames, poor tracking, video stabilisation, filters, and ordinary editing can all produce artifacts. I’m looking for a pattern that persists across multiple frames and makes physical sense as a tracking or compositing problem.
This test is also more useful for some deepfake architectures than others. A conventional face-swap pipeline may produce obvious boundary or tracking artifacts because a synthetic face is being integrated into an existing scene. A fully generated video can fail in different ways because the entire scene may be synthesised together rather than composited face-by-face.
That’s why I don’t stop after finding — or failing to find — a floaty face. It’s one layer of the investigation. If I don’t see anything here, I move on to other temporal clues such as blinking, facial motion, lighting consistency, background stability, and eventually metadata.
The good news is that this test takes almost no equipment. Give me a short suspicious clip, a video player, and thirty seconds of careful scrubbing, and I can often find much more information than I would get from simply watching the video once.
Don’t just watch the face. Watch whether the face stays attached to the movement of the person. That’s the habit I want you to build before we move to the next temporal clue.
rPPG — The Heartbeat Deepfakes Can’t Fake (Yet)
This is where deepfake detection gets really interesting for me, because we’re no longer asking whether a face looks real. We’re asking whether the video contains a biological signal that should be coming from a living person.
That signal is called rPPG, or remote photoplethysmography. The name sounds complicated, but the underlying idea is surprisingly simple. Let me break it down.
You may already be familiar with PPG without realising it. Your smartwatch uses optical sensors to estimate your heart rate. A pulse oximeter does something similar. They shine light onto your skin and measure tiny changes associated with blood-volume changes as your heart beats.
Now take that idea and move the sensor away from your skin.
Instead of placing a sensor against your fingertip or wrist, we use a camera. As your heart pumps blood through your body, the amount of blood in the small vessels near the skin changes slightly. Those changes can produce extremely small variations in the colour and reflectance of the skin.
You can’t normally see those changes consciously. A camera and the right signal-processing algorithms can.
That’s remote photoplethysmography.
In a suitable video, software can analyse regions of the face — commonly areas such as the forehead and cheeks — and extract subtle periodic colour variations. Over enough frames, those variations can reveal a signal related to the person’s pulse.
And this gives us a completely different question to ask when we’re investigating a suspicious video:
Does the face contain a plausible physiological signal, or are we only seeing pixels that look like skin?
This is particularly interesting for deepfake detection because traditional image-generation systems are primarily optimising for visual realism. They’re trying to produce convincing colour, texture, lighting, facial structure, and motion. A biological signal such as blood-volume variation is a different problem.
But here’s an important distinction I want you to remember: absence of a clean rPPG signal does not automatically prove that a video is fake. Camera quality, lighting, compression, skin tone, movement, frame rate, video length, makeup, motion blur, and even the way the footage was encoded can all affect the signal. A real person can produce a poor or unusable rPPG measurement.
The same caution applies in the other direction. Finding a periodic signal doesn’t prove that a video is authentic. A sophisticated manipulation could preserve, distort, or potentially synthesise physiological-looking signals. That’s why I treat rPPG as a powerful forensic signal rather than a magic “real or fake” button.
Research into rPPG-based deepfake detection is nevertheless important because it moves detection beyond purely visual artefacts. Instead of asking only whether the generated face looks convincing, researchers can ask whether the video contains physiological information consistent with a living subject.
One of the best-known examples is Intel’s FakeCatcher, which explored biological signals including blood-flow-related information as part of deepfake detection. Research results have been promising in controlled settings, but you should be careful with headline accuracy numbers: performance in a laboratory dataset does not mean the same accuracy will hold against every compressed social-media video or every new generation of deepfake.
So I wouldn’t call rPPG a bulletproof detector. I call it something more useful: an additional layer of evidence that comes from a different physical process.
That’s what makes it valuable.
When I investigate a suspicious video, I don’t want every test to depend on the same visual clue. If the attacker fixes the face boundary, I’ve lost one signal. If they improve temporal consistency, I’ve lost another. But a physiological measurement gives me a fundamentally different angle of investigation.
And that leads to one of the most important ideas in this entire series: the strongest deepfake investigation isn’t based on one perfect detector. It’s based on combining independent signals — visual evidence, temporal behaviour, physiological clues, provenance, and metadata — and asking whether they all tell the same story.
That is how I want you to think about rPPG. Not as a magical heartbeat test, but as a fascinating piece of biological evidence that can make a deepfake investigation much harder for an attacker to fool.
Blinking Patterns and the 3D Headpose Problem
After I check for a floaty face, blinking is usually the next thing I watch. I like this test because it’s quick, completely visual, and it forces me to pay attention to how the face behaves over time rather than whether one particular frame looks convincing.
Start with the basics. A healthy adult typically blinks several times per minute, but there isn’t one magic number that defines a “real” blink pattern. Blink rate changes with attention, fatigue, conversation, lighting, eye irritation, screen use, and many other factors. Individual blinks also vary in duration and completeness.
That variability is exactly what I want you to notice.
When I’m checking suspicious footage, I don’t simply count the number of blinks and declare the video real or fake. Instead, I watch the movement of the eyelids across several blinks. Does the opening and closing look natural? Does the eyelid boundary remain stable? Does the eye region deform smoothly from one frame to the next?
There are a few things worth watching for.
First, completely absent blinking. This was a well-known weakness of early face-swap systems, particularly when training material contained lots of photographs with open eyes. Modern systems have improved considerably, so a person not blinking during a short clip is not proof of manipulation. But if you have a longer recording and the eyes remain unnaturally fixed open for an extended period, it is still worth treating as a warning sign — especially when other anomalies are present.
Second, unnatural repetition. I wouldn’t use a stopwatch and assume that a blink occurring every few seconds means “deepfake.” Real humans can produce surprisingly regular patterns during certain activities. What interests me is whether the blinks look mechanically identical: the same eyelid movement, the same apparent duration, and the same transition every time. Repetition becomes more meaningful when it appears alongside other temporal artifacts.
Third, the blink boundary. This is where slowing the video down becomes useful. Watch the eyelid as it closes and opens. Does the boundary move smoothly from frame to frame, or does it appear to shimmer, ghost, deform, or briefly change shape? Compression can create similar effects, so again, I’m looking for a persistent pattern rather than one ugly frame.
Then I move from the eyes to the entire head.
Head pose is one of my favourite stress tests for face-swap systems. A model may look excellent when the subject is facing the camera but become less convincing when the face rotates substantially away from that familiar orientation.
Watch what happens when the person turns sideways, looks sharply upward, tilts their head downward, or moves quickly through several angles. The important question is whether the synthetic face appears to rotate naturally with the underlying head.
Look closely at the jawline, cheeks, ears, hairline, eyes, and facial boundaries. Does the geometry remain coherent as the head turns? Does one part of the face appear to remain unnaturally frontal while the rest of the head rotates? Does the face briefly stretch or distort before settling back into place?
These failures can happen because face manipulation involves estimating and transforming three-dimensional facial geometry from two-dimensional imagery. Extreme or unusual poses can make that estimation harder, particularly when the system has limited information about parts of the face that were previously hidden.
This is also why an unusual but harmless movement can be a useful verification technique in a live interaction. If you are already suspicious of a video call, asking the person to turn their head, look in a particular direction, or perform a spontaneous gesture can create additional temporal evidence.
But there’s an important rule here: never treat a single failed movement as proof of a deepfake. Video conferencing software, poor lighting, camera autofocus, compression, network latency, and ordinary tracking failures can produce surprisingly strange results.
What I’m really looking for is convergence. If the blink behaviour looks strange, the face boundary also wobbles during movement, and the head pose produces repeated geometry errors, those independent clues become much more interesting together.
So when you watch a suspicious video today, don’t ask yourself, “Did this person blink?” Ask a better question: “Does this face behave like a real three-dimensional face across time?”
That shift in thinking is much more useful than any single blink-counting rule.
Metadata Forensics — What the File Itself Reveals
After I’ve finished looking at the video itself, I like to turn my attention to something most people completely ignore: the file.
Think about it this way. The pixels tell me what the video looks like. The metadata can give me clues about how that file was created and processed. It isn’t a perfect history book, and metadata can be removed or rewritten, but it gives me another layer of evidence that is completely different from what I see on screen.
Most video files contain some form of technical metadata. Depending on the device and the software involved, that can include timestamps, file format, codec, frame rate, resolution, colour information, encoder details, and sometimes information about the device that created the original recording. Smartphone footage can contain considerably more information, although exactly what survives depends on the device, operating system, camera application, and subsequent processing.
And this is where I want you to adopt the same mindset we used in email-header forensics: don’t look at one field and jump to a conclusion. Look at the whole story.
Suppose someone tells you, “This is an original video I recorded on my phone this morning.” I don’t immediately believe or disbelieve them. I ask whether the technical evidence is consistent with that claim.
First, I check the timestamps. Creation, modification, media-creation, and filesystem timestamps can sometimes tell you when different stages of the file’s life occurred. But be careful here. A timestamp isn’t a cryptographic proof of when the camera recorded the footage. Files can be copied, exported, edited, uploaded, downloaded, and re-encoded, and different software handles timestamps differently.
So if the dates don’t make sense, I treat that as a clue to investigate, not a verdict.
Next, I look for device and software information. If the original file genuinely came directly from a particular smartphone, I may expect to see metadata consistent with that device and its recording pipeline. If instead I find evidence that the file passed through a video editor, transcoder, or other processing application, I want to know why.
Again, context matters. Someone opening a perfectly genuine phone recording in Premiere Pro or DaVinci Resolve and exporting it again can legitimately replace or add software-related metadata. That doesn’t make the video a deepfake.
Then I look at the codec and encoding information. This is useful because cameras, editing applications, messaging platforms, social networks, and AI-generation systems can all leave different technical characteristics behind. But codec analysis is not as simple as “iPhone equals HEVC, therefore H.264 equals fake.” Real-world video gets transcoded constantly.
What I’m really asking is whether the encoding history is consistent with the story I’m being told.
Location information can be useful too. Some original recordings may contain GPS coordinates when location tagging is enabled. If coordinates are present, they can provide an independent way to check a claimed filming location. But if GPS metadata is missing, I don’t automatically conclude that something is suspicious. Platforms and editing tools routinely strip metadata, and many recordings never contain location information in the first place.
This is an important principle for the entire exercise: missing metadata is evidence of missing metadata — not automatically evidence of manipulation.
The same applies to AI-generated video. Some generation or editing pipelines may leave software or encoder information that differs from what you’d expect from a native camera recording. But metadata is not a permanent fingerprint. A file can be exported, transcoded, uploaded to a social platform, downloaded again, and processed several more times before it reaches you.
So when I find something interesting in metadata, I cross-check it against the video itself. If the visual evidence says one thing and the file history suggests something completely different, that’s when the investigation gets interesting.
For today’s beginner exercise, you don’t need expensive forensic software. Metadata2Go can give you a quick look at the metadata exposed by an uploaded file, while ExifTool is the more powerful option when you want detailed command-line analysis. WeVerify can also be useful as part of a broader verification workflow.
One privacy warning before you start uploading anything: don’t send sensitive personal videos to an online metadata service unless you’re comfortable with its handling and privacy practices. For private or sensitive footage, a local tool such as ExifTool is the safer approach.
In Exercise 3, I’ll have you compare three videos and look specifically for differences in timestamps, encoding information, device/software identifiers, and other available metadata.
The goal isn’t to find one magical field that says DEEPFAKE: TRUE. That field doesn’t exist.
The goal is to become good at asking a much better forensic question: does the file’s technical history make sense for the story this video is supposed to tell?
InVID/WeVerify is the toolkit used by professional fact-checkers and journalists to verify video authenticity in newsrooms. It’s free, runs entirely in your browser, and provides reverse image search on video keyframes, metadata extraction, and geolocation analysis in a single interface. Today you install it and use it on a real suspicious video. This is the exact workflow I use when a video lands in my investigation queue.
- Go to weverify.eu and install the WeVerify browser extension for Chrome or Firefox. Alternative: use the web app version at weverify.eu/tools/ — same features, no install required.
- Find a video you’re genuinely uncertain about. Good candidates: a viral TikTok showing something surprising, a “leaked” video circulating on Twitter, a political clip you saw that seemed too convenient. Save the video URL.
- Run InVID keyframe analysis on the video. The tool extracts representative frames from the video for reverse-image searching. This is the most powerful single feature — a deepfake video reused from earlier legitimate content is often catchable by finding the original frames elsewhere online.
- For each extracted keyframe, run reverse image search on Google and TinEye directly from the WeVerify interface. What comes back? Is the footage older than the claimed date? Does it appear in a different context with different attribution?
- Run metadata extraction on the video file. Compare what the metadata says about creation date, device, and encoding to what the video’s context claims. Any mismatches are strong signals worth investigating further.
Compression Artifacts at Edit Boundaries
Here’s another test I like to use when I’m looking at a suspected face-swap: the boundary test. This one takes a little practice, but once you know what you’re looking for, certain compositing artifacts become much easier to notice.
Before we get into the test, let me make one thing clear: real video doesn’t necessarily have perfectly uniform compression across every pixel. Modern cameras and video codecs do a lot of processing, and the footage may already contain sharpening, denoising, chroma subsampling, HDR processing, motion compression, or other transformations.
So I’m not looking for a frame where every part has identical compression.
I’m looking for a local discontinuity that doesn’t make sense.
Imagine the original camera frame as one continuous image. If somebody takes a face from another source, processes it, and blends it into that frame, the inserted region has gone through a different processing path. Depending on the pipeline, that difference can sometimes survive the final export.
When I zoom in, I pay particular attention to the transition between the face and the surrounding areas — the jawline, cheeks, hairline, neck, ears, and especially places where another object passes in front of the face.
That’s where things get interesting.
For example, suppose the person raises their hand in front of their mouth. A real camera records the hand, face, and surrounding scene as one physical event. In a face-swap, the system has to correctly determine which pixels belong to the replacement face and which belong to the foreground object.
If that separation isn’t handled perfectly, you may see a tiny halo around the hand, a strange edge, a momentary texture change, or a boundary that appears to shimmer as the object moves across the face.
Those occlusion boundaries are particularly useful to inspect.
Try this yourself. Find a suspicious clip where the subject’s face is partially covered by a hand, microphone, glasses, hair, clothing, or another object. Slow the video down and scrub through the moment where the object crosses the face.
Don’t just look at whether the face looks realistic. Watch the edge where the two regions meet.
Does the boundary remain stable? Does the foreground object correctly stay in front? Does the skin texture suddenly change near the edge? Does a faint halo appear for a few frames? Does the boundary flicker as the person moves?
If you see several of these behaviours repeatedly, you’ve found something worth investigating.
There’s another reason I like this test: movement makes compositing mistakes easier to expose. A perfectly static face can hide a lot of problems. Once the subject moves, or another object crosses the face, the system has to maintain the correct geometry and layering from frame to frame.
But don’t make the mistake of treating a strange edge as automatic proof of a deepfake. Compression, autofocus, sharpening, motion blur, low-resolution footage, chroma subsampling, and ordinary video editing can all create halos and edge artefacts.
And this test has an architectural limitation. It is most useful when you’re investigating compositing-based manipulation, such as a conventional face swap. If an entire frame is generated or reconstructed as a single synthetic scene, there may not be a distinct face boundary to inspect.
That’s why I use the boundary test as one piece of the larger workflow. If I find an unusual edge, I go back to the timeline and see whether the same problem appears across multiple frames. Then I compare it with the other evidence — head movement, blinking, lighting, background consistency, and metadata.
The rule I want you to remember is simple: don’t hunt for ugly pixels; hunt for boundaries that behave strangely over time.
That small change in how you inspect a video can make this test much more useful.
The Free Video Verification Workflow
Now let’s put everything together.
This is the workflow I use when a suspicious video lands in front of me. I don’t start by trying to guess whether it’s AI-generated. I work through the evidence in layers, starting with the quickest checks and moving toward the more detailed ones.
For a short clip, you can get through the basic workflow in roughly four to five minutes. If something looks suspicious, slow down and investigate further. The goal isn’t to race to a verdict — it’s to build enough independent evidence to make a defensible assessment.
Step 1: Find the video’s original context.
I start with WeVerify and InVID. Instead of reverse-searching the entire video as one object, I extract several representative keyframes and search those frames using available reverse-image search engines such as Google Images or TinEye.
I’m asking a very simple question: have I seen this footage before?
This matters because a manipulated video doesn’t necessarily start with newly generated footage. An old interview, speech, protest, television broadcast, or unrelated event can be repurposed and presented with a completely different claim. If I can find an older version of the footage, I’ve immediately learned something important about its provenance.
Step 2: Inspect the metadata.
Next, I examine whatever metadata survived in the file. You can use a browser-based metadata viewer such as Metadata2Go, or use WeVerify’s available analysis features.
I look at timestamps, encoding information, device or software identifiers, frame rate, resolution, and any available location information. Then I compare those details with the story attached to the video.
For example, if someone says a clip is an untouched smartphone recording but the file clearly shows evidence of several stages of video processing, that’s worth investigating. It still isn’t proof of a deepfake — ordinary editing and social-media re-encoding can produce similar metadata — but it gives me another piece of the puzzle.
Step 3: Analyse the video over time.
This is where I slow things down.
I play the clip normally first and look for moments involving rapid head movement, blinking, changes in expression, or objects crossing the face. Then I go back to those moments and scrub through them slowly.
I’m looking for the things we’ve covered: a face that appears to drift relative to the head, unstable facial boundaries, unnatural eyelid movement, geometry that breaks during a head turn, flickering around occlusion boundaries, or other inconsistencies that persist across multiple frames.
I don’t use a fixed blink count as a pass/fail test. Instead, I look at the quality and variability of the blink itself and compare multiple blinks when the clip is long enough to provide useful evidence.
Step 4: Go back to the individual frame.
Only after looking at the video as a sequence do I return to the frame-level checks from Day 2.
I pick a clear, well-lit frame where the face is large enough to inspect and run through the 8-point checklist. I pay particular attention to the ears, eyes, hairline, teeth, skin texture, facial boundaries, lighting, and background details.
This order matters. If I start with one frame, I can become anchored to what that frame appears to tell me. By analysing the timeline first, I have already looked for the inconsistencies that only become visible through movement.
Step 5: Verify the claim itself.
Finally, I investigate the story attached to the video.
What event is supposedly happening? Who is speaking? When and where was it supposedly recorded? What exactly is the person claiming or saying?
Then I search for independent reporting. Do reputable news organisations, official sources, eyewitness accounts, or other independent recordings support the event? Can I find the same speech from another angle? Does an earlier version of the video show something different?
A video can look completely authentic and still be misleading because the footage has been taken out of context. Conversely, a genuine event can be accompanied by a manipulated clip. That’s why authenticity and context are separate questions.
So my final assessment isn’t simply “AI” or “not AI.” I’m looking at several evidence categories: provenance, metadata, temporal behaviour, frame-level artefacts, and the underlying claim.
If all five point in the same direction, my confidence increases. If they disagree, I don’t force a conclusion. I investigate the conflict.
That’s the habit I want you to take away from today’s lesson.
Don’t ask, “Can I spot the deepfake?” Ask, “What independent evidence can I collect about this video?”
Once you start working that way, you stop relying on a single visual tell and start thinking like a video verifier.
Design the video deepfake creation pipeline for a CEO impersonation attack — a 5-minute video call where you need to convince a finance director to approve a wire transfer. Understanding the attacker’s pipeline reveals exactly where a careful defender detects the fraud. This is the exact analytical exercise I put in front of security teams before they build their organisation’s deepfake response playbook.
- Choose your target: the CFO of a mid-sized company. The attack is a 5-minute video call to the finance director requesting an urgent wire transfer for a confidential acquisition. Standard Hong Kong-style scenario.
- Map footage needs: how much source footage do you need of the CFO to build a convincing 5-minute face swap? How many different angles? What lighting conditions? Where would you find that footage publicly (YouTube interviews, quarterly earnings calls, internal videos that leaked)?
- Identify the hardest part of maintaining the deepfake for 5 minutes versus 10 seconds. What are your temporal consistency risks over 300 seconds of video that don’t exist over 10 seconds? Consider blinks, head movements, changes in speaking pace.
- Consider what fails when the target asks you to do something unexpected. What if the finance director asks the “CFO” to hold up a piece of paper with today’s date on it? To turn their head to show the office in the background? To scratch their nose in a specific way?
- Identify the single detection point where a careful defender wins. If you were briefing the finance director on how to spot this attack in real time, what one instruction would you give them?
Metadata tells a story the video itself doesn’t. This exercise trains you to read that metadata story and spot inconsistencies that reveal tampering. Once you can read metadata fluently, you catch a whole class of deepfakes without any visual analysis at all.
- Select 3 videos: (a) one known real video from your own phone — a clip you recorded yourself in the last week; (b) one video you’re uncertain about — something suspicious from social media; (c) one clearly AI-generated video from a source like Runway ML’s public demos or a known deepfake example from a fact-checking article.
- Go to metadata2go.com — free, browser-based, no account needed. Upload each video in turn.
- For each video, record the following fields from the metadata output: Make, Model, Software, Creation Date, Modification Date, Codec, Frame Rate, Resolution, GPS coordinates if present. Take screenshots or write these into a table.
- Compare the three metadata profiles side by side. What’s present in your real video that’s missing in the AI-generated one? What’s different between the uncertain video and the two known cases?
- Check what a native iPhone or Android recording should produce. Every phone puts Make, Model, and matching Creation and Modification dates. Missing any of those on content claimed to be from a specific person’s phone is a strong signal. Software fields like “Lavf” or “libx264” identify ffmpeg-based encoding — common in AI tool output, rare in native camera output.
Questions and Answers
Can these techniques work on live video calls in real time?
Partially. Live video calls are the hardest deepfake detection scenario because you can’t scrub frame by frame, extract metadata, or run reverse image search on live footage. What you can do live: watch for floaty face during natural head movement, count blinks over 30 seconds and check whether they’re variable or metronomic, and — most powerfully — ask the person to do something novel and specific. Have them hold up a piece of paper with today’s date written on it. Ask them to touch a specific object in their environment. Real people handle these requests easily. Deepfake systems handle them poorly or not at all. The novel-request test is the single strongest live video call defence and it takes seconds to run.
Video was shared via WhatsApp — can I still get metadata?
Mostly no, but partially yes. WhatsApp aggressively strips metadata from videos as part of its privacy model. Most identifying metadata — GPS, device info, original creation date — is removed by the time the video reaches you. What remains: codec fingerprints from WhatsApp’s re-encoding, some technical settings, and the fact that the video was processed through WhatsApp’s pipeline (which itself is a data point). If you can get the original file directly from the sender — not through WhatsApp — the full metadata is often preserved. Same problem applies to Signal, Telegram, and most messaging platforms. Social platforms like Twitter, Instagram, and TikTok also strip metadata but often less aggressively than direct-messaging apps.
Could rPPG signal be present in some deepfakes?
In principle, a sufficiently advanced future model could learn to simulate blood-flow colour changes in generated video. In practice, no current publicly available deepfake tool does this because it requires modelling a biological system that isn’t otherwise represented in the training data. Research is emerging on synthesising rPPG-friendly video, and detection researchers are correspondingly working on more sophisticated physiological signals to stay ahead. For 2026 the answer is: rPPG absence is a very strong signal that content is synthetic, and there’s no consumer tool exploiting this because Intel’s FakeCatcher is research-only and no other detector has shipped yet. That gap will close within a year or two — expect consumer rPPG-based detectors by 2027.
How long does a full temporal analysis take on a 5-minute video?
The full 5-step workflow takes 8 to 12 minutes on a 5-minute clip once you have the toolkit installed. WeVerify keyframe search is about a minute regardless of clip length. Metadata is 30 seconds. Temporal analysis scales with video length — for a 5-minute video focus on 3 to 5 representative sections rather than every second. Visual checklist on extracted frames is about 90 seconds per frame. Cross-referencing the claim is context-dependent. For high-stakes verification before publishing, spreading, or making financial decisions, the investment is worthwhile. For casual verification of low-stakes viral content, a quick keyframe reverse search plus metadata check is often enough.
Are there tools that automate the whole video verification workflow?
Not fully in the free tier. Professional tools like Sensity AI, Truepic, and academic Deepfake Detection Challenge tools provide partial automation but are either paid, research-focused, or require significant technical setup. WeVerify is the closest thing to an integrated free workflow — it combines keyframe extraction, reverse search, and metadata in one interface. For a beginner, the manual 5-step workflow using WeVerify plus metadata2go.com is the right balance of coverage and accessibility.
Is deepfake video detection more or less reliable than image detection in 2026?
Slightly more reliable overall, because video has more attack surface — every second is another opportunity for temporal inconsistency to reveal itself. Static image detection has been getting harder as diffusion models close artifact gaps. Video detection has stayed more accessible because temporal consistency, rPPG signals, and metadata forensics have each remained detectable while frame-level detection has weakened. My estimate: with proper training a beginner catches 70 to 85 percent of video deepfakes using today’s workflow, versus 60 to 80 percent of image deepfakes using Day 2’s checklist. That’s likely to reverse as video generation improves — but for 2026, video detection is where beginners have the strongest tools.
Further Reading
- AI Deepfake Hub — the full SecurityElites deepfake library
- How Hackers Use Social Engineering 2026 — the attack context video deepfakes fit into
- Email Header Analyzer — the metadata forensics pattern applied to email
- WeVerify — the tool used in today’s Exercise 1
- MIT Detect Fakes Project — academic research on video detection