PREMIUM
Part of the Offensive AI Operator — 30-Day Course
Ninety percent of people who quit a hands-on security course quit on setup — not on the hard material, on the lab that wouldn’t build. So before we touch a single attack, we’re going to build your AI red team lab properly, pin every moving part so it behaves the same in six months as it does today, and end with one command that green-checks the whole thing. Get this hour right and the next thirty days just work. Skip it, or rush it, and you’ll spend Day 1 debugging Docker instead of learning to break models. Let’s build the range.
🎯 What You’ll Build in Setup
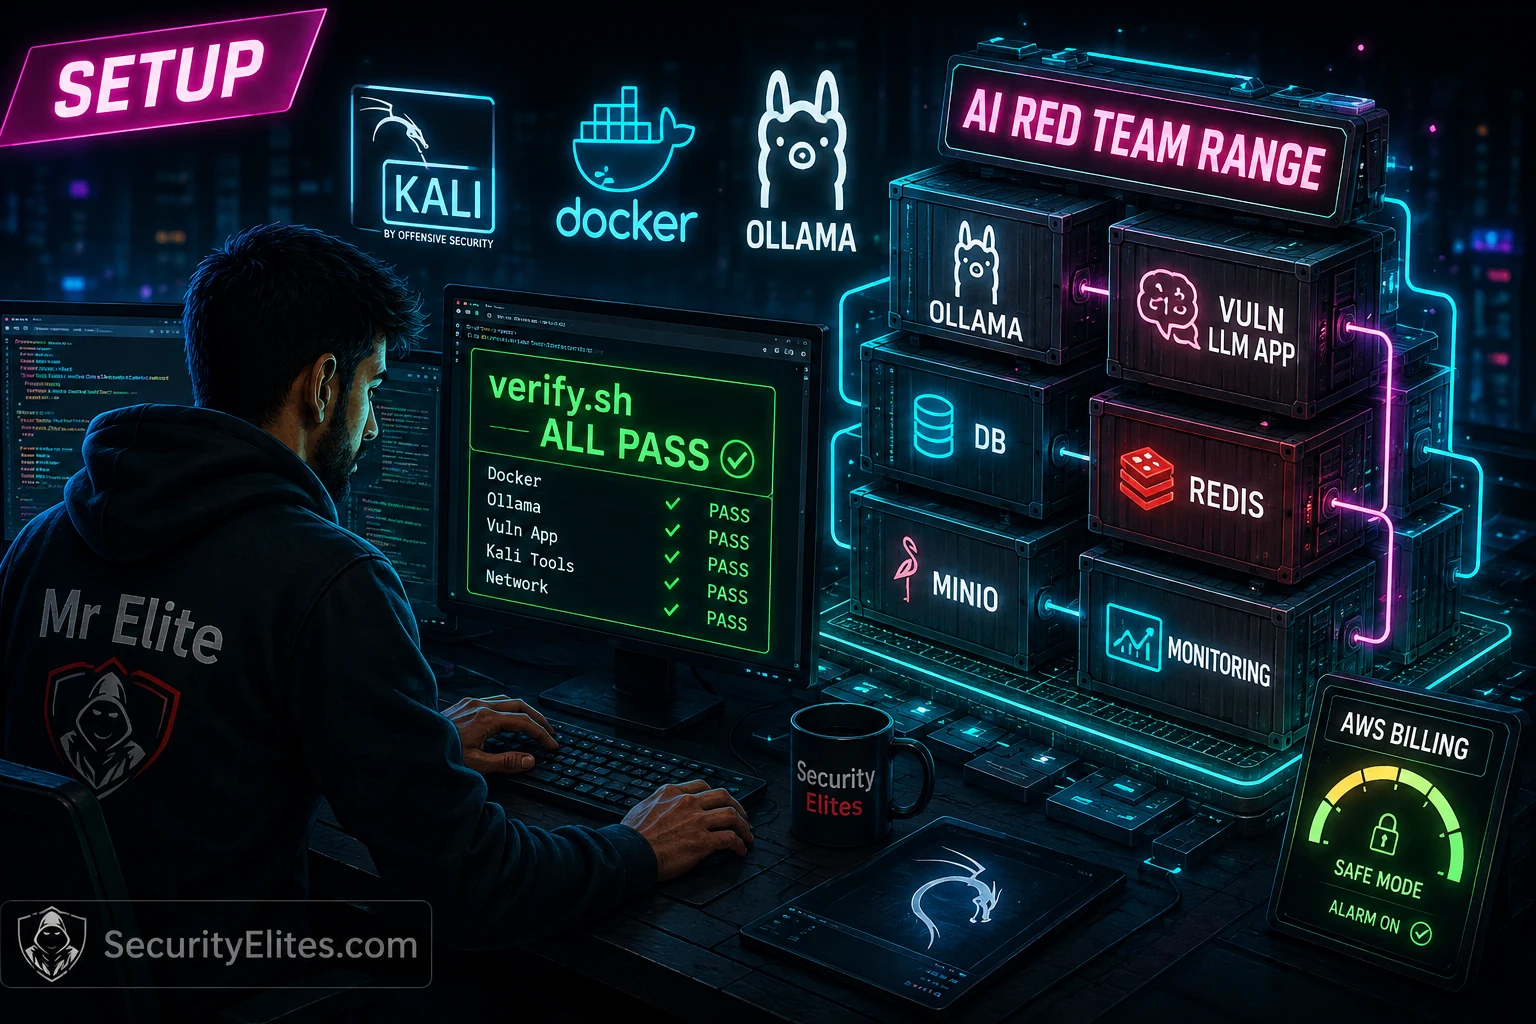
verify.sh — your green light to start Day 1⏱️ ~60 min · 3 exercises · gates the entire course
- A machine with 16 GB RAM recommended (8 GB works with a smaller quantised model), ~40 GB free disk, and virtualization enabled.
- Comfort in a terminal and with Burp — this course assumes a working pentester. If that’s not you yet, start with our general hacking lab setup first.
- A credit/debit card for a free-tier cloud account (used read-mostly, capped — you should not incur real charges if you follow the alarm step).
AI Red Team Lab Setup 2026: Build Your Range in One Hour
Welcome to the setup module for the Offensive AI Operator. This is Day 0 — un-numbered, because it’s not a lesson, it’s the workbench every lesson sits on. By the end you’ll have a complete, pinned AI red team lab and a green verify.sh. Then, on Day 1, we start mapping. If you’ve built a traditional lab before — our legal home-lab guide covers that world — this is the AI-specific version, and the differences matter.
Why the AI red team lab is built this way
Before the commands, spend two minutes on the why, because it explains every choice you’re about to make and it’s the difference between a lab you understand and a lab you copy-pasted. Three decisions define this range, and each one is a deliberate answer to a way AI labs usually rot.
Decision one — everything runs locally
You could point this course at a paid API and learn plenty. We don’t, for three reasons that all matter. Cost: firing thousands of attack iterations at a metered API turns a course into a bill. Determinism: a hosted model updates on someone else’s schedule, so the exploit you learn on Tuesday can vanish on Thursday when the vendor ships a new version — I’ll show you that failure mode later and it’s maddening. And terms of service: hammering a commercial endpoint with jailbreak payloads is a fast way to get an account banned, and it blurs the ethical line this course is careful to keep sharp. Local open models via Ollama solve all three at once — free, frozen, and entirely yours to abuse.
There’s a fourth reason I’ll say plainly because it’s easy to miss: running the model yourself means you can see inside. When the target is somebody’s API, the model is a black box — you send text, you get text, and everything in between is hidden. When you host it, you control the temperature, you can watch resource usage spike when a payload makes the model work harder, and later in the course you can inspect what the model actually received after the app assembled its prompt. That visibility turns guesswork into observation. A hosted API teaches you to attack blind; a local range teaches you to attack with the lights on, and the instincts you build with the lights on make you far sharper when you’re eventually back in the dark against a real target.
Decision two — everything is pinned
“Pinned” is the word you’ll hear me repeat more than any other. A lab that says “install the latest Kali” or “pull the model” is a lab that behaves differently for two students on the same day and differently for you next month. We pin the host version, the container tags, and — most importantly — the exact model digest, not the floating latest tag. When you build your own labs after this course, pinning is the single discipline that separates a range you can trust from a range that lies to you. A result you can’t reproduce is not a result.
Let me make the failure concrete so the discipline sticks. Imagine you skip the pin and just ollama pull llama3.1:8b whenever. You spend Day 9 building a jailbreak that works beautifully. Two weeks later you come back to demonstrate it and it flatly fails — and you have no idea why, because you changed nothing you can see. What changed is that latest quietly pointed at an updated build with different behaviour, and the model you built your attack against no longer exists on your disk. Now multiply that across thirty days and every technique you learned, and you understand why an unpinned AI lab is worse than useless: it teaches you things that stop being true and gives you no way to tell which. The digest you record in Step 3 is a promise that the target you attack today is the same target you can re-attack in a month. Keep that promise and the whole course stays reproducible.
Decision three — the cloud account is real but caged
The cloud days need a real account — you can’t learn IAM escalation against a simulator that doesn’t behave like AWS. So we use a genuine free-tier account, but we cage it: read-mostly usage, a hard billing alarm wired before anything else, and cleanup after each cloud day. The goal is to touch real cloud primitives without ever touching a real bill or a real third party. That balance — real enough to learn, caged enough to be safe — is the whole philosophy of this range in miniature.
A word on hardware, before you hit a wall
The one resource that decides whether this range runs smoothly is RAM, and it’s worth being honest about it now rather than watching you discover it mid-build. An 8B model wants roughly 8 GB of memory to itself while it’s loaded, and the Docker stack wants its own share on top. On a 16 GB machine you’re comfortable — model loaded, containers up, Burp open, room to spare. On 8 GB you can still do the course, but you’ll run one thing at a time and lean on a smaller quantised model, and you’ll want to stop the app containers when you’re only working with the model directly. Below that, you’ll fight the machine more than the material. None of this needs a powerful GPU — these models run on CPU, just slower — so don’t let the absence of a graphics card stop you. Plan the memory, ignore the GPU, and the range behaves. If your machine is genuinely too small, that’s the one place a cheap cloud VM for the duration of the course is a reasonable spend, and it’s the only spend this course asks of you.
The build: seven steps to a hot range
Work through these in order. Each step ends in a state you can confirm before moving on — don’t push forward on faith, because a silent failure early makes a confusing failure late. Total time is about an hour, most of it waiting on downloads.
Step 1 — Prepare the host
Kali 2026.2 or Ubuntu 24.04, updated once, with the handful of tools the range assumes. We pin to these two because they’re what verify.sh expects; another distro may work but you’re on your own for paths.
Step 2 — Install and sanity-check Docker
Everything except the models runs in Docker, so a healthy Docker daemon is non-negotiable. Install it, add yourself to the docker group so you’re not sudo-ing every command, then log out and back in for the group to take effect.
Step 3 — Install Ollama and pin the models
This is the AI-specific heart of the range. Install Ollama, then pull the two models we use by digest, not by the floating tag. The commands below pull the tags; the pinning discipline is that you record the digest verify.sh reports and never re-pull latest over the top of it.
 $ ollama list
 NAME             ID            SIZE     MODIFIED
 llama3.1:8b      42182419e950  4.7 GB   just now   ← record this ID
 qwen2.5:7b       845dbda0ea48  4.4 GB   just now   ← and this one

 # THE ID IS THE PIN. If it ever changes, your labs changed too.
Step 4 — Stand up the vulnerable LLM app
The course ships a deliberately vulnerable LLM application, se-vuln-llm, that every attack day targets. It’s not a hosted service you log into — it’s code you clone from the course repo and run entirely on your own machine, so the target you attack is one you own outright. Clone the range repo, bring it up with the pinned compose file, and confirm it answers.
Don’t take a JSON reply as “done” — take it as “the wiring is alive,” which isn’t the same thing. Before you move on, look at the container health directly, because an app that starts and an app that’s healthy are different states, and the gap between them is where a lot of Day 1 frustration hides. The compose file ships a healthcheck for exactly this reason; read it.
 $ docker compose ps
 NAME           IMAGE              STATUS                 PORTS
 se-vuln-llm    oaio/vuln:day1     Up 40s (healthy)       0.0.0.0:8080->8080
 se-vectordb    oaio/qdrant:pin    Up 40s (healthy)       0.0.0.0:6333->6333
 se-proxy       oaio/gateway:pin   Up 40s (healthy)       0.0.0.0:8080->8080
  ── "(healthy)" on every row is the state you want, not just "Up" ──
Notice there’s more than one container here. The vulnerable app itself is only part of the range — there’s a vector database (you’ll poison it on Day 11) and a small gateway (it shapes traffic you’ll inspect in Burp). You don’t need to understand them yet; you just need all three showing (healthy) before you continue. If one is stuck on starting for more than a minute, that’s a signal, and the failure-states section below tells you which one to look at.
Step 5 — Wire Burp as the proxy
You’ll live in Burp for the recon days, so set it up now. Point your browser at Burp’s proxy, install Burp’s CA cert so HTTPS doesn’t scream at you, and confirm you can see the app’s traffic. If you’ve proxied a normal web app before, this is identical — the app just happens to talk to a model behind the scenes.
Here’s the one AI-specific thing to check while you’re in here, and it pays off on Day 1: send a chat message through the app with intercept on, and confirm you can see your message sitting in the request body before it reaches the model endpoint. That’s the moment that matters, because the entire recon phase depends on being able to watch — and modify — text on its way into the context window. If your message shows up in the intercepted request as plain, editable JSON, your proxy is positioned exactly where you need it. If it doesn’t, you’re either not proxying the right traffic or the app is doing something client-side worth noting. Either way, better to learn it now during setup than mid-lab tomorrow.
Step 6 — Create a safe, budget-capped cloud account
The cloud days (19–21, 26) need a real AWS free-tier account. Before you create a single resource, wire a billing alarm — this is the step people skip and regret. Set a low threshold, confirm the alarm, and only then proceed. Read-mostly is the rule: you’ll build deliberately weak configurations in your own account and attack them, then tear them down.
Set the billing alarm low enough that it fires before anything real happens — a few dollars, not fifty. The point isn’t to catch a catastrophe, it’s to catch the small mistake early: a resource you forgot to stop, a service that isn’t as free-tier as you assumed. Alongside the alarm, get in the habit from day one of tearing down what you build. Each cloud day ends with a teardown, and the reason is the same reason a professional never leaves a client’s account dirty — an orphaned resource isn’t just a cost, it’s an unmonitored piece of attack surface you created and walked away from. Treat your own lab account with the discipline you’d owe a client’s, and the discipline is there when it counts.
Step 7 — Run verify.sh
The range ships a verification script that checks every component in one shot. This is your green light, and the rule for the whole course is simple: if verify.sh isn’t all-green, you don’t start the day. It saves you from the worst outcome in a self-paced course — debugging your environment while thinking you’re debugging the lesson.
The one command that proves your AI red team lab works
Run it from the range directory. It checks host tools, the Docker daemon, both pinned models and their digests, the vulnerable app’s reachability, and the app-to-Ollama wiring. Read the output top to bottom — a single red line is a reason to stop and fix, not to push on and hope.
 $ ./verify.sh
 [PASS] host        Ubuntu 24.04 detected
 [PASS] docker      daemon reachable, non-root OK
 [PASS] python      3.11 venv active
 [PASS] ollama      service up
 [PASS] model       llama3.1:8b  digest 42182419e950  (pinned)
 [PASS] model       qwen2.5:7b   digest 845dbda0ea48  (pinned)
 [PASS] app         se-vuln-llm reachable on :8080
 [PASS] wiring      app → ollama round-trip OK
 ────────────────────────────────────────────────
 RANGE STATUS: ALL PASS — you are cleared for Day 1
That’s it — the range is hot. Every one of the next thirty days assumes this exact state, which is why we built it once, carefully, instead of improvising a target per lesson. Keep the range directory; keep the digests you recorded; keep this screenshot.
Take a second to understand what those eight green lines are actually telling you, because verify.sh isn’t magic — it’s the same handful of confirmations you’d otherwise do by hand, bundled so you can’t forget one. The host check catches the wrong-distro problem before it produces mysterious path errors three steps later. The Docker check confirms not just that Docker exists but that you can drive it without sudo, which is the single most common setup snag. The two model checks are the ones that matter most for this course specifically: they confirm the models are present and print their digests, so you can compare against your pin and catch a silent version drift the moment it happens. The app and wiring checks confirm the two hardest-to-diagnose failures — a container that started but isn’t serving, and an app that’s serving but can’t reach the model. Every one of these is a failure I’ve watched cost someone an evening. The script turns an evening into a line of output.
Here’s the habit I want you to build around it: run verify.sh at the start of every session, not just today. It takes three seconds and it answers the question that silently wrecks self-paced learning — “is my environment actually in the state I think it’s in?” Nine times out of ten it’s green and you move on. The tenth time, it hands you the exact red line instead of letting you burn forty minutes attacking a target that was never up. Cheap insurance, every single day.
⚡ EXERCISE 1 — KALI TERMINAL (30 MIN)
Build the complete range end to end, following Steps 1–7, on your own machine.
Step 1. Prep the host and confirm the release.
Step 2. Install Docker and pass hello-world without sudo.
Step 3. Install Ollama, pull both models, and record their digests.
Step 4–7. Bring up the app, wire Burp, cap the cloud account, run verify.sh.
✅ What you just learned: to stand up a reproducible AI testing range from nothing — the baseline skill under every lab in this course.
📸 Post your all-green verify.sh in #day0-setup.
⚡ EXERCISE 2 — KALI TERMINAL (15 MIN · BREAK & FIX)
Deliberately break one component, watch verify.sh catch it, then fix it. This builds the muscle you’ll actually use when the range breaks mid-course.
✅ What you just learned: to read verify.sh as a diagnostic, not just a gate — the fastest way to un-stick a broken range.
📸 Share the red line you produced and how you fixed it in #day0-setup.
🧠 EXERCISE 3 — THINK LIKE A HACKER (10 MIN · NO TOOLS)
Two questions, no commands. Write a sentence on each.
1. Why does pinning the model digest matter more for an attack lab than for a normal dev environment?
2. The course insists on local models over a paid API. Beyond cost, name the reason that protects both your results and your ethics.
✅ What you just learned: the reasoning behind the range is the same reasoning you’ll defend in a real report.
📸 Post your two answers in #day0-setup.
What your range will and won’t teach you
Before you close the terminal, let me orient you to what you just built, because a range you understand is worth ten you merely assembled. Every component here maps to days ahead, and knowing that now turns setup from a chore into a preview.
The vulnerable app is your primary target for the entire AI red team block — Days 7 through 18. Every prompt injection, every jailbreak, every tool-abuse and output-handling attack lands here first, because it’s safe, it’s yours, and it’s built to be broken in instructive ways. The vector database you saw in the compose output is dormant until Day 11, when you poison it to hijack retrieval; it’s running now only so the app’s retrieval features work end to end. The pinned models are the thing under test — on Day 2 you’ll learn to fingerprint which model sits behind an app, and having two different models in your range is what makes that drill real, because you can practise telling them apart. The cloud account sleeps until the back third of the course, when web recon and cloud misconfiguration become the on-ramp to the AI layer. And Burp is the constant — it’s how you see everything, every day.
Now the honest part: what this range can’t do. It can’t teach you the feeling of a real engagement’s pressure, the ambiguity of an undocumented target, or the politics of a client who doesn’t want to hear that their flagship AI feature is a liability. A lab is deliberately fair — the target holds still, the scope is clear, the model is pinned. Real work is none of those things. What the range gives you is the technique, cleanly, so that when you meet the mess of a real engagement you’re only fighting the mess, not also fumbling the fundamentals. That’s the right division of labour: learn the moves here where the ground is stable, so you can improvise out there where it isn’t. The capstone on Days 27–30 is the closest this course comes to the real thing — a target that chains across everything you’ve built — and it’s the bridge between this fair little range and the unfair world you’re training for.
One last thing to internalise while your range is fresh: this environment is a skill, not just a setup. The ability to stand up a safe, pinned, self-contained target for whatever you’re studying is one of the most quietly valuable habits in this whole field. Long after you’ve forgotten the exact commands, you’ll reach for the instinct — “before I attack this, let me build a version I own and understand” — and that instinct is what separates people who read about attacks from people who can actually run them. You didn’t just build a lab today. You practised the thing you’ll do at the start of every serious piece of research for the rest of your career.
Your lab is clean and controlled. Real engagements aren’t, and the gap is worth naming now so the range teaches you the right instincts. On a real target you don’t get to pin the model — the client runs whatever they run, and it changes without telling you. The reproducibility you’re building here is a luxury the lab affords you precisely so you can learn the techniques cleanly; on the engagement you’ll port those techniques to a moving target and lean on evidence capture instead of pinning.
You also won’t get a verify.sh in the field. What you’ll have instead is the habit it trains: never assume the environment is in the state you think it’s in — confirm it. The best testers I know run a mental verify.sh at the start of every session, checking that their tooling, their proxy, and their scope are exactly what they believe before they trust a single result. That habit starts here, with a literal script, and graduates into instinct. And the caged-cloud discipline — alarm first, cleanup after, read-mostly by default — is not lab hygiene you’ll drop later; it’s exactly how a professional treats a client’s cloud account, where an unattended resource isn’t a small bill, it’s an incident.
Failure states — the ten setup problems
This is the day things break, so here’s the catalogue. Nine out of ten setup problems are one of these. If you hit something that isn’t, that’s useful signal — post it and we’ll fold it in.
- docker: permission denied. You didn’t log out and back in after
usermod -aG docker. The group membership only applies to a fresh login. - Ollama pulled but the model won’t load. Almost always RAM. An 8B model needs ~8 GB free; close everything else or drop to a smaller quantised tag, and record that as your pin instead.
- ollama list shows a different digest than a classmate. One of you pulled at a different time and got an updated build. Agree on a digest and both pull to match — this is pinning in practice.
- App starts but /chat times out. The app can’t reach Ollama. Check that Ollama is serving on the host and the compose file points at the right host address, not
localhostfrom inside the container. - verify.sh fails on “wiring” but everything else passes. App is up, Ollama is up, but they can’t talk — a Docker networking issue. The failure-states section of the range README has the exact compose fix.
- Burp shows nothing. Browser isn’t actually using the proxy, or you’re on a profile without it. Confirm the proxy in the dedicated profile and that the CA cert is installed.
- HTTPS errors everywhere in the browser. Burp’s CA cert isn’t trusted. Install it into the browser profile’s certificate store, not the OS store alone.
- No billing alarm email arrived. You must confirm the alarm’s subscription — an unconfirmed alarm is no alarm. Re-check and confirm before creating any cloud resource.
- Python venv won’t activate. You installed
python3.11but notpython3.11-venv. Install the venv package and recreate. - Everything passed yesterday, red today. Usually the app container didn’t restart with the host.
docker compose up -dand re-runverify.sh— and note that “worked yesterday” is exactly the assumption verify.sh exists to stop you trusting.
Your deliverable
Two things in your engagement folder before you move on: your all-green verify.sh screenshot, and a short range.md noting the two model digests you pinned, your host release, and the date you built the range. That file is the first page of your capstone evidence — thirty days from now, when your report says “reproducible as of this build,” this is where that claim comes from. The range is hot, the pins are recorded, the receipt is saved. Tomorrow, on Day 1, we stop building and start mapping. Bring the range up before you begin — docker compose up -d, ./verify.sh, all green — and I’ll see you in the situation room.
📋 Commands Used Today — Setup Reference Card
docker run --rm hello-world — prove the Docker daemon works without sudoollama pull llama3.1:8b — fetch a course model (record its digest as your pin)ollama list — confirm models and read the pinning digestdocker compose up -d — bring the vulnerable app online./verify.sh — green-check the whole range; your gate to start any dayWhat do I need to build an AI red team lab?
Why pin the model version in an AI lab?
Do I need a paid OpenAI or Anthropic key for this course?
How much RAM do I need to run local models?
Is it safe to use a real cloud account for lab exercises?
What is verify.sh?
Further Reading
- How to Set Up a Hacking Lab (2026) — the traditional-lab foundation this AI range builds on.
- Kali Linux Installation Guide 2026 — if your host isn’t ready yet.
- Practice Ethical Hacking Legally at Home — the legal framing behind “your targets only.”
- External: Ollama model library — pinnable local models and their tags.
- External: Docker Compose docs — the compose reference behind the range.