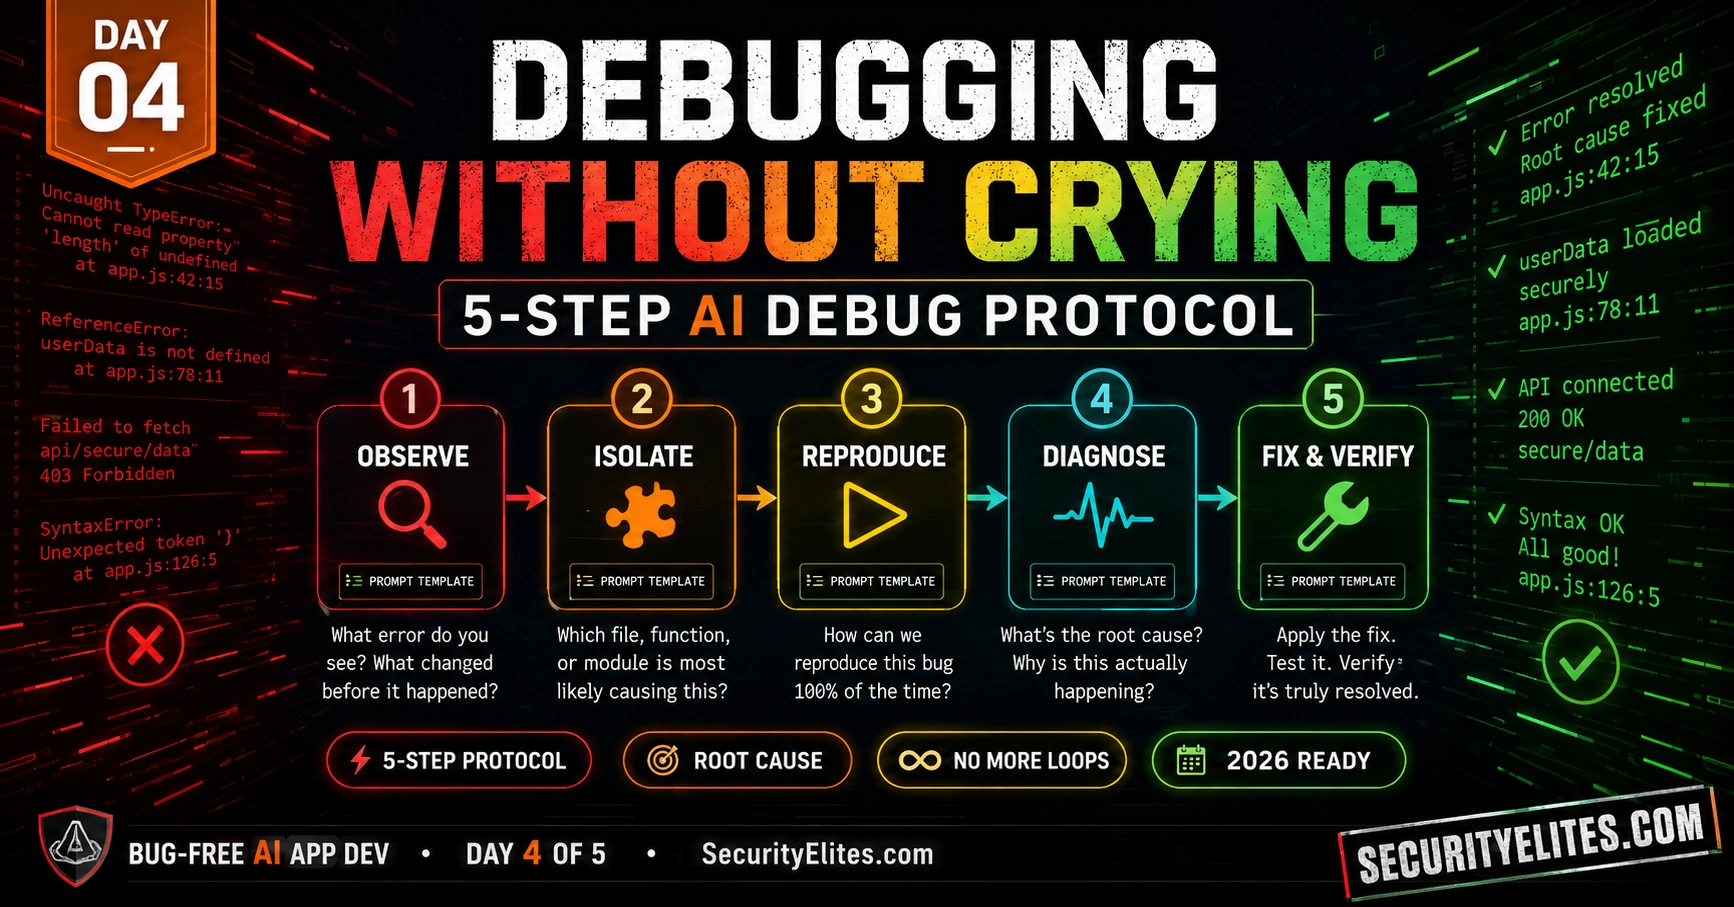
The worst debugging AI Code session I ever watched lasted four hours for a bug that was a single missing await keyword. Four hours. Because the developer’s debugging process was “change something, reload, see if it still breaks, change something else.” No protocol. No systematic isolation. Just increasingly frustrated guesses until something accidentally worked.
With AI coding, this failure mode gets worse before it gets better. Most people’s instinct when something breaks is to paste the error into Claude and say “fix this.” Claude produces a fix. The fix changes something else. A new error appears. They paste that. Another fix. Another error. They’ve entered the debugging loop — the AI equivalent of whack-a-mole, where each fix introduces new problems because the root cause was never diagnosed.
The five-step debug protocol eliminates this loop. It’s systematic, it produces root-cause fixes rather than symptom fixes, and it works the same way on every type of bug. Today I teach you the protocol, and today SecureVault goes from modules to a working, integrated application — including whatever integration bugs appear and how to dispatch them in minutes rather than hours.
🎯 What You’ll Master in Day 4
⏱ 25 min read · 3 exercises · Browser + code editor needed
- Completed Day 3 with smoke test passing 7/7
- Have securevault/ folder with: contracts.js, utils.js, crypto.js, validation.js, storage.js, entry-service.js, ui-components.js
Debugging AI Code without Crying — Day 4 of 5
- Why Debugging Loops Happen and How to Break Them
- Step 1: Observe — Read the Error Completely
- Step 2: Isolate — Find the Smallest Reproduction
- Step 3: Reproduce — Confirm the Bug Before Fixing
- Step 4: Diagnose — The Root Cause Bug Report Template
- Step 5: Fix and Verify — The Patch + Regression Test
- The Three Most Common Integration Bugs
- Questions and Answers
The AI Coding Day 3 covers reading and understanding AI code structurally. Today goes deeper: not how to read code but how to fix it systematically. The email header analyzer is a useful mental model here — parsing a structured error message is the same skill as parsing a structured email header: both require knowing which fields to read, in what order, and what each field tells you about the root cause. Same protocol, different domain.
Why Debugging Loops Happen and How to Break Them
A debugging loop happens when you fix symptoms without diagnosing the root cause. The symptom changes — you get a different error message — but the underlying problem remains. Each “fix” is actually a patch that sometimes hides the original bug and sometimes exposes a new one.
With Claude specifically, debugging loops are fed by one thing: incomplete context. When you paste an error message without the surrounding code, Claude makes its best guess at the root cause from the error text alone. That guess is often wrong — error messages are frequently misleading about where the problem actually originated. Claude generates a fix for the wrong root cause. A different error appears. You paste that. The loop continues.
I’ve tracked my own debugging sessions carefully across dozens of AI-built applications. My average time to resolve a bug using the full protocol: eight minutes. My average time before I had the protocol, using the “paste error, get fix, try it” approach: forty-five minutes. The difference isn’t Claude’s capability — the same model, the same code. The difference is the quality of context I give it. A precise bug report with reproduction steps and isolated code gives Claude everything it needs to identify the root cause. A bare error message gives it almost nothing.
The protocol breaks the loop by providing complete, structured context before asking for a fix — and by explicitly separating the diagnosis step from the fix step. Diagnosis first. Fix only after root cause is confirmed. This single discipline change eliminates the majority of multi-round debugging sessions. I never skip it, even for bugs that seem obvious. The “obvious” ones are exactly where I’ve been most wrong about the root cause.
Step 1: Observe — Read the Error Completely
The first step is to read the full error, not just the first line. Browser console errors have structure: an error type, a message, and a stack trace. Each part tells you something different about where the problem is.
at getAllEntries (storage.js:45)
at EntryService.getAll (entry-service.js:78)
at App.renderList (app.js:23)
// READ IT BOTTOM UP for origin → top for immediate failure:
// WHAT: TypeError — something is undefined that shouldn’t be
// WHERE IT FAILED: storage.js line 45 — getAllEntries function
// CALLED FROM: entry-service.js:78, called from app.js:23
// ROOT CAUSE CANDIDATE: getAllEntries returns something without a ‘data’ property
// CHECK: does getAllEntries always return OperationResult? What about the empty case?
Read the error type to understand the category: TypeError (shape mismatch), ReferenceError (undefined variable), SyntaxError (code that can’t parse), RangeError (value out of bounds), DOMException (browser API issue). Read the message for the specific problem. Read the stack trace — specifically the first line that shows your own code (not a browser internal) — for the exact location of the failure.
Step 2: Isolate — Find the Smallest Reproduction
Isolation means: find the smallest piece of code that demonstrates the bug independently of the rest of the application. This serves two purposes. First, it confirms that you’ve correctly identified where the bug lives. Second, it gives Claude the minimal context needed to diagnose it — which produces faster, more accurate fixes than pasting the entire application.
The isolation test from Day 3 is the fastest path to isolation: run the module in isolation in the browser console. If the isolated module works, the bug is in the integration between modules. If the isolated module fails, the bug is within the module. That branching is the fastest possible diagnosis of where to look.
I want to emphasise something about this step that took me too long to appreciate: isolation is also about ruling things out. When I run the storage module in isolation and it passes, I’ve eliminated storage as the source of the bug. That elimination is valuable information — it tells me where NOT to look. In a nine-module application, systematically ruling out modules is often faster than tracing forward from the error location. My workflow: run isolation test on the module at the bottom of the stack trace first, then work upward. The first module that fails its isolation test is the source.
Module test PASSES → bug is in integration (wiring between modules)
→ Check: are you calling the function with the right argument types?
→ Check: are you handling OperationResult correctly ({success, data, error})?
→ Check: are you awaiting async functions?
Module test FAILS → bug is inside the module
→ Check: does the function handle the specific input you’re passing?
→ Check: does the error match the quality gate for that function?
→ Use Day 3 Template 4 (write tests) to find the failing case
Step 3: Reproduce — Confirm the Bug Before Fixing
Before asking Claude to fix anything, confirm you can reproduce the bug reliably. A bug you can reproduce reliably is a bug you can verify is fixed. A bug you can’t reproduce reliably might be a race condition, a timing issue, or something that requires specific state — and patching it without understanding the reproduction condition is how you produce fixes that “seem to work” but silently break under specific conditions.
The reproduction confirmation is simple: run the exact steps that cause the bug twice. If the same error appears both times from the same steps, you have a reliable reproduction. If the error appears inconsistently, note that in your bug report — it’s important diagnostic information that tells Claude this might be a timing or state issue.
I learned the hard way why this step matters. Early in my AI-assisted development work, I had an intermittent bug in an entry deletion flow — it would fail about one in five attempts. I pasted the error and got a fix that looked correct. The fix seemed to resolve it — three consecutive deletions worked. I shipped. Two days later, the bug was back, reported by a user. The root cause was a race condition between the deletion animation completing and the storage update — a timing issue my fix hadn’t addressed, just made less likely. If I had documented the reproduction condition (intermittent, roughly 20% failure rate), Claude would have immediately flagged the likely race condition and I would have found the real root cause.
Step 4: Diagnose — The Root Cause Bug Report Template
This is the template that replaces “fix this error” in every debugging session. It provides Claude with the complete, structured context needed to diagnose the root cause rather than guess at a fix.
OBSERVED ERROR:
[Paste the FULL error message and stack trace — every line]
REPRODUCTION STEPS:
1. [Exact step 1]
2. [Exact step 2]
3. [What happened vs what was expected]
CODE AT THE FAILURE POINT:
“`javascript
// [Paste the function or section where the error occurred — from the stack trace]
“`
CODE THAT CALLS IT:
“`javascript
// [Paste the calling code — the line that triggers the failure]
“`
ISOLATION TEST RESULT: [Did the module work in isolation? Yes / No / Not tested]
TASK: (1) Identify the root cause in one sentence. (2) Explain why the error appears at the observed location rather than the root cause location. (3) Provide the minimal fix — change only what is necessary. Do NOT refactor unrelated code. After fix: “Root cause: [one sentence]. Fix: [what changed].”
The key instruction is “(3) Provide the minimal fix — change only what is necessary.” Without this, Claude sometimes responds to a bug by refactoring the entire function, changing naming conventions, and restructuring the module. This produces new bugs from unnecessary changes. The minimal fix principle: touch only the line(s) that are wrong. Everything else is already tested and working — don’t risk it.
Step 5: Fix and Verify — The Patch + Regression Test
After applying a fix, run two verifications: (1) confirm the original bug no longer reproduces, and (2) run the isolation test for the fixed module to confirm the fix didn’t break anything else. The second verification is what prevents fixes from introducing new bugs.
The Three Most Common Integration Bugs
Based on building dozens of modular applications with Claude Opus 4.8, three bugs appear in almost every first integration. Knowing them in advance means you can prevent them with quality gates, and when they do appear, diagnose them in under a minute.
Bug 1 — Missing await on async functions. Entry service functions that call crypto operations are async. If app.js calls entryService.createEntry() without await, it receives a Promise object instead of an OperationResult. Downstream code tries to read result.success on a Promise — TypeError. Prevention: in the App module prompt, add “every call to EntryService must be awaited — add async to every handler function”. Detection: TypeError: Cannot read properties of undefined (reading 'success') where result is a Promise object.
Bug 2 — OperationResult not checked before accessing .data. A function returns {success: false, error: "Storage unavailable"} and the calling code immediately does result.data.forEach(...)). The data property is undefined when success is false — TypeError. Prevention: quality gate “every OperationResult must be checked for .success before accessing .data”. Detection: TypeError: Cannot read properties of undefined (reading 'forEach').
Bug 3 — Module load order in index.html. A module that depends on utils.js is loaded before utils.js in the script tags. The dependent module tries to call generateId() before it’s defined — ReferenceError. Prevention: build-order prompt from Day 2 gives you the correct script tag sequence. Detection: ReferenceError: generateId is not defined.
Build app.js and index.html — the final two files that integrate everything into a working application. These are the most complex files because they connect all other modules together. I’ll give you both prompts.
- Send the app.js prompt:APP.JS PROMPT — COPY AND SENDYou are a senior JavaScript developer. Generate app.js for SecureVault — the entry point that wires all modules together. Dependencies: entry-service.js, ui-components.js. This is the ONLY file that touches the DOM. Module-level state: searchQuery (string, ”).
Export: initApp() → void (called on DOMContentLoaded).
App flow on load: (1) call entryService.hasExistingVault() — if false, show #setup-screen; if true, show #unlock-screen. (2) #setup-screen submit: read password + confirm-password fields, check they match (show inline error if not), call await entryService.initService(password) — on success, hide setup screen, show #app-screen, render entry list. (3) #unlock-screen submit: read password field, call await entryService.initService(password) — if result.success is false, show the error message from result.error in an inline error element on the unlock form (do not use a toast for this — it must be visible and not auto-dismiss) and clear the password field; if success, hide unlock screen, show #app-screen, render entry list.
App-screen behaviours, each must update the UI immediately after the action completes — no action should require a manual refresh: (a) Add-entry form submit → await entryService.createEntry(title, content, category) → if success: clear the form fields, re-render the entry list by calling getAllEntries() and re-rendering #entry-list, show a success toast via renderToast(); if failure (validation errors): show each error in result.error as an error toast, do NOT clear the form. (b) View button click (event delegation, event.target.dataset.action === ‘view’) → await entryService.getEntry(id) → if success: render #modal-overlay with renderModal(content, title) and show it; if failure: show error toast. Modal close button → hide #modal-overlay. (c) Delete button click (event.target.dataset.action === ‘delete’) → show a confirm() dialog “Delete this note? This cannot be undone.” → if confirmed: await entryService.deleteEntry(id) → if success: re-render #entry-list by calling getAllEntries() again, show success toast; if failure: show error toast. (d) Search input → on every input event: update searchQuery, call entryService.searchEntries(searchQuery), re-render #entry-list with the filtered results — if searchQuery is empty, call getAllEntries() instead and show all. (e) Whenever the rendered entry list would be empty (zero entries, or zero search results), render #entry-list with renderEmptyState() instead of an empty container.
Toast behaviour: every renderToast() call inserts the toast into a #toast-container, and the toast auto-removes itself from the DOM after 3000ms via setTimeout.
All EntryService calls must be awaited. All OperationResult must check .success before accessing .data. Event delegation pattern: one listener on the list container, check event.target.dataset.id and event.target.dataset.action. Security: never store the password in any variable after passing to initService — assign to parameter, call service, let go. Constraints: ES6+, zero external dependencies. Quality gates: wrong password on unlock shows “Incorrect password” inline and does not proceed to #app-screen, creating an entry immediately makes it visible in the list without a page refresh, deleting an entry immediately removes it from the list without a page refresh, empty list and empty search results both show renderEmptyState(). Deliver one fenced JS code block. After code: “Complete: app.js · event handlers wired”. No preamble.
- Send the index.html prompt:INDEX.HTML PROMPT — COPY AND SENDYou are a senior frontend developer. Generate index.html — the shell file for SecureVault, a browser-based encrypted notes app. Include: a complete CSS block implementing the SecureVault UI (dark theme: #050810 background, #f97316 accent, #e2e8f0 text, #1e293b borders, Syne font for headings from Google Fonts, JetBrains Mono for code/labels). Include these HTML sections with IDs: #setup-screen (password setup form with a password field, a confirm-password field, an inline #setup-error element for validation messages, and a submit button — both screens are hidden/shown by app.js, not by default visibility, since app.js decides which to show based on hasExistingVault()), #unlock-screen (password unlock form with a password field, an inline #unlock-error element for “Incorrect password”, and a submit button), #app-screen (main app layout with header, #search-container with a search input, #add-entry-form with title/content/category fields, #entry-list container), #modal-overlay (entry viewer modal with a close button — hidden by default), #toast-container (fixed-position container for toast notifications, empty by default). All three of #setup-screen, #unlock-screen, #app-screen start with the CSS class “sv-hidden” (display:none) — app.js removes/adds this class to control which is visible; do not hard-code which one starts visible since that decision belongs to app.js. Script tags in this exact order (type=”module” on app.js only, others are plain scripts): utils.js, crypto.js, validation.js, storage.js, entry-service.js, ui-components.js, then app.js (type=module). app.js calls initApp() on DOMContentLoaded. Constraints: no external CSS frameworks, responsive (mobile-first), all BEM class names matching ui-components.js output (sv- prefix), password input fields use type=”password”. After file: “Complete: index.html · [N] CSS rules · full shell structure”. No preamble.
- Save both files. Open index.html in your browser. If it opens without console errors, the integration is clean.
Before debugging tools exist, the most valuable skill is reading an error message and reasoning to the root cause without running anything. I want you to diagnose three integration errors from the error message alone — the same skill that cuts your debugging time from hours to minutes.
- For each error below, use what you know about the SecureVault architecture to diagnose: (a) which module contains the root cause, (b) what the root cause is, (c) what the minimal fix is:
- Error A:
TypeError: result.data is undefined — at App.renderList (app.js:45) - Error B:
ReferenceError: generateId is not defined — at saveEntry (storage.js:23) - Error C:
DOMException: The operation is not supported — at encrypt (crypto.js:67)
- Error A:
- For Error C specifically: this is the WebCrypto availability issue we flagged in Day 2’s architecture review. What’s the fix? How does your architecture (the OperationResult pattern) make this gracefully catchable?
- Write the root-cause bug report (Step 4 template) for Error A. Fill in every section as if you’d actually reproduced it.
Complete the SecureVault integration test. Run through the full user flow and verify every feature works — including the two flows that are easiest to silently skip: deletion and wrong-password handling. Any bugs you find, dispatch with the protocol. By the end of this exercise, SecureVault is a working, usable, encrypted notes app.
- Setup flow: Open index.html. You should see the setup screen (not the unlock screen — this is your first run,
hasExistingVault()should return false). Set a master password and confirm it (minimum 8 chars, 1 uppercase, 1 number — your validation rules). Does it accept the password and show the main app? If not — what error appears? Diagnose with the protocol. - Create entry: Type a title, some content, select a category, click save. Does the entry card appear in the list immediately, without a page refresh? Does the form clear? Does a success toast appear and then disappear after a few seconds? Does the card show title, category badge, and timestamp?
- View entry: Click the View button on a card. Does a modal appear with the decrypted content? Does the close button hide the modal? The fact that you can read the content means WebCrypto encrypt and decrypt are both working.
- Search: Type part of your entry title in the search box. Does the list filter correctly? Clear the search — does the full list return?
- Delete: Create a second throwaway entry specifically to delete. Click its Delete button. Does a confirmation dialog appear? Confirm it. Does the card disappear from the list immediately, without a page refresh? If you delete every entry, does the empty state message appear?
- Persistence — correct password: Refresh the page. You should now see the unlock screen, not setup (
hasExistingVault()should now return true). Enter your correct master password. Are your remaining entries still there and still readable via View? This tests that storage.js saved the CryptoConfig correctly and that crypto.js re-derives the identical key from the saved salt. - Persistence — wrong password: Refresh the page again. This time, deliberately enter the wrong password on the unlock screen. You should see an inline “Incorrect password” message — not a crash, not a blank entry list, not a silent failure. Try the correct password again afterward and confirm it still works.
- If any step fails: use the 5-step protocol. Steps 6 and 7 are the most likely to surface issues — they exercise the CryptoConfig save/retrieve/verify flow, which is the most complex logic in the entire application.
Questions and Answers
What if Claude’s fix introduces a new bug?
This happens when the fix changes more than it needed to. The minimal fix instruction in Step 4 reduces this significantly, but doesn’t eliminate it. When a fix introduces a new bug: run Step 5 (regression test) first — this will catch the new failure. Then treat the new bug as a fresh instance of the protocol: new bug report, new root cause, new minimal fix. Don’t compound fixes — each bug report should address exactly one root cause. If you find yourself in a third round of the same area of code, that’s a signal the root cause wasn’t correctly identified in the first two rounds. At that point, use a fresh session with Claude, paste the complete module, and ask for a fresh read: “This function has had two attempted fixes and still behaves incorrectly. Please do a fresh audit of the function for logical errors.”
How do I debug something that only breaks sometimes?
Intermittent bugs are always either race conditions (two things happen in an order that varies) or state-dependent (the bug only appears after certain previous actions). For race conditions in browser apps: look for async operations that don’t have await, event listeners that fire while previous async operations haven’t resolved, and timers. For state-dependent bugs: find the minimal state that triggers the bug — what actions have to happen before the bug appears? That sequence is the reproduction case. Once you have a reliable reproduction, the protocol runs normally. The bug report’s “reproduction steps” section is especially important for intermittent bugs — write exactly the state setup required.
Should I always use the full 5-step protocol, or can I skip steps for simple bugs?
Steps 1, 4, and 5 are always worth doing. Steps 2 and 3 can be abbreviated for very simple bugs. If you look at an error message and immediately know the exact root cause (e.g., you see a ReferenceError for a function you know you haven’t imported yet), you can skip isolation and reproduction and go straight to the bug report. The protocol is most valuable for non-obvious bugs — the ones where the error location and the root cause location are different, and where a naive fix would patch the symptom rather than the cause. For obvious bugs: fix them. For anything that requires more than ten seconds of thinking: run the protocol.
What’s the difference between a root cause fix and a defensive fix?
A root cause fix changes the code that’s actually wrong. A defensive fix adds protection at the point where the failure was observed without changing the root cause. Example: result.data.forEach(...) throws TypeError because result.success is false. A root cause fix adds the success check where it belongs (in the calling code that received result). A defensive fix might add a default value: (result.data || []).forEach(...). Defensive fixes prevent the crash but leave the underlying problem — the code is still receiving error results and not handling them. Both fix the crash, but only the root cause fix makes the code actually correct. For production code, always prefer root cause fixes. Defensive fixes accumulate into code that looks fine but silently swallows errors.
Further Reading
- How to Audit AI Generated Code Security — the full security review process beyond today’s basics
- AI Powered Exploit Code Generation — what attackers do with the same tools you’re learning
- Vibe Coding Security Risks — the broader consequences of skipping verification
- Replit — run and test code online without any installation
- PortSwigger Web Security — learn about XSS and other vulnerabilities that affect the code you build